

Everything you need to run FicMe with confidence.
Step-by-step guidance for individuals, businesses and accountable institutions — covering signup, AI autofill, identity verification, requests, OTP consent, share links, the audit trail, and the iOS / Android apps.
Can't find your answer?
Log a support ticket — billing, system errors, claiming your account and more.
1. Welcome to FicMe
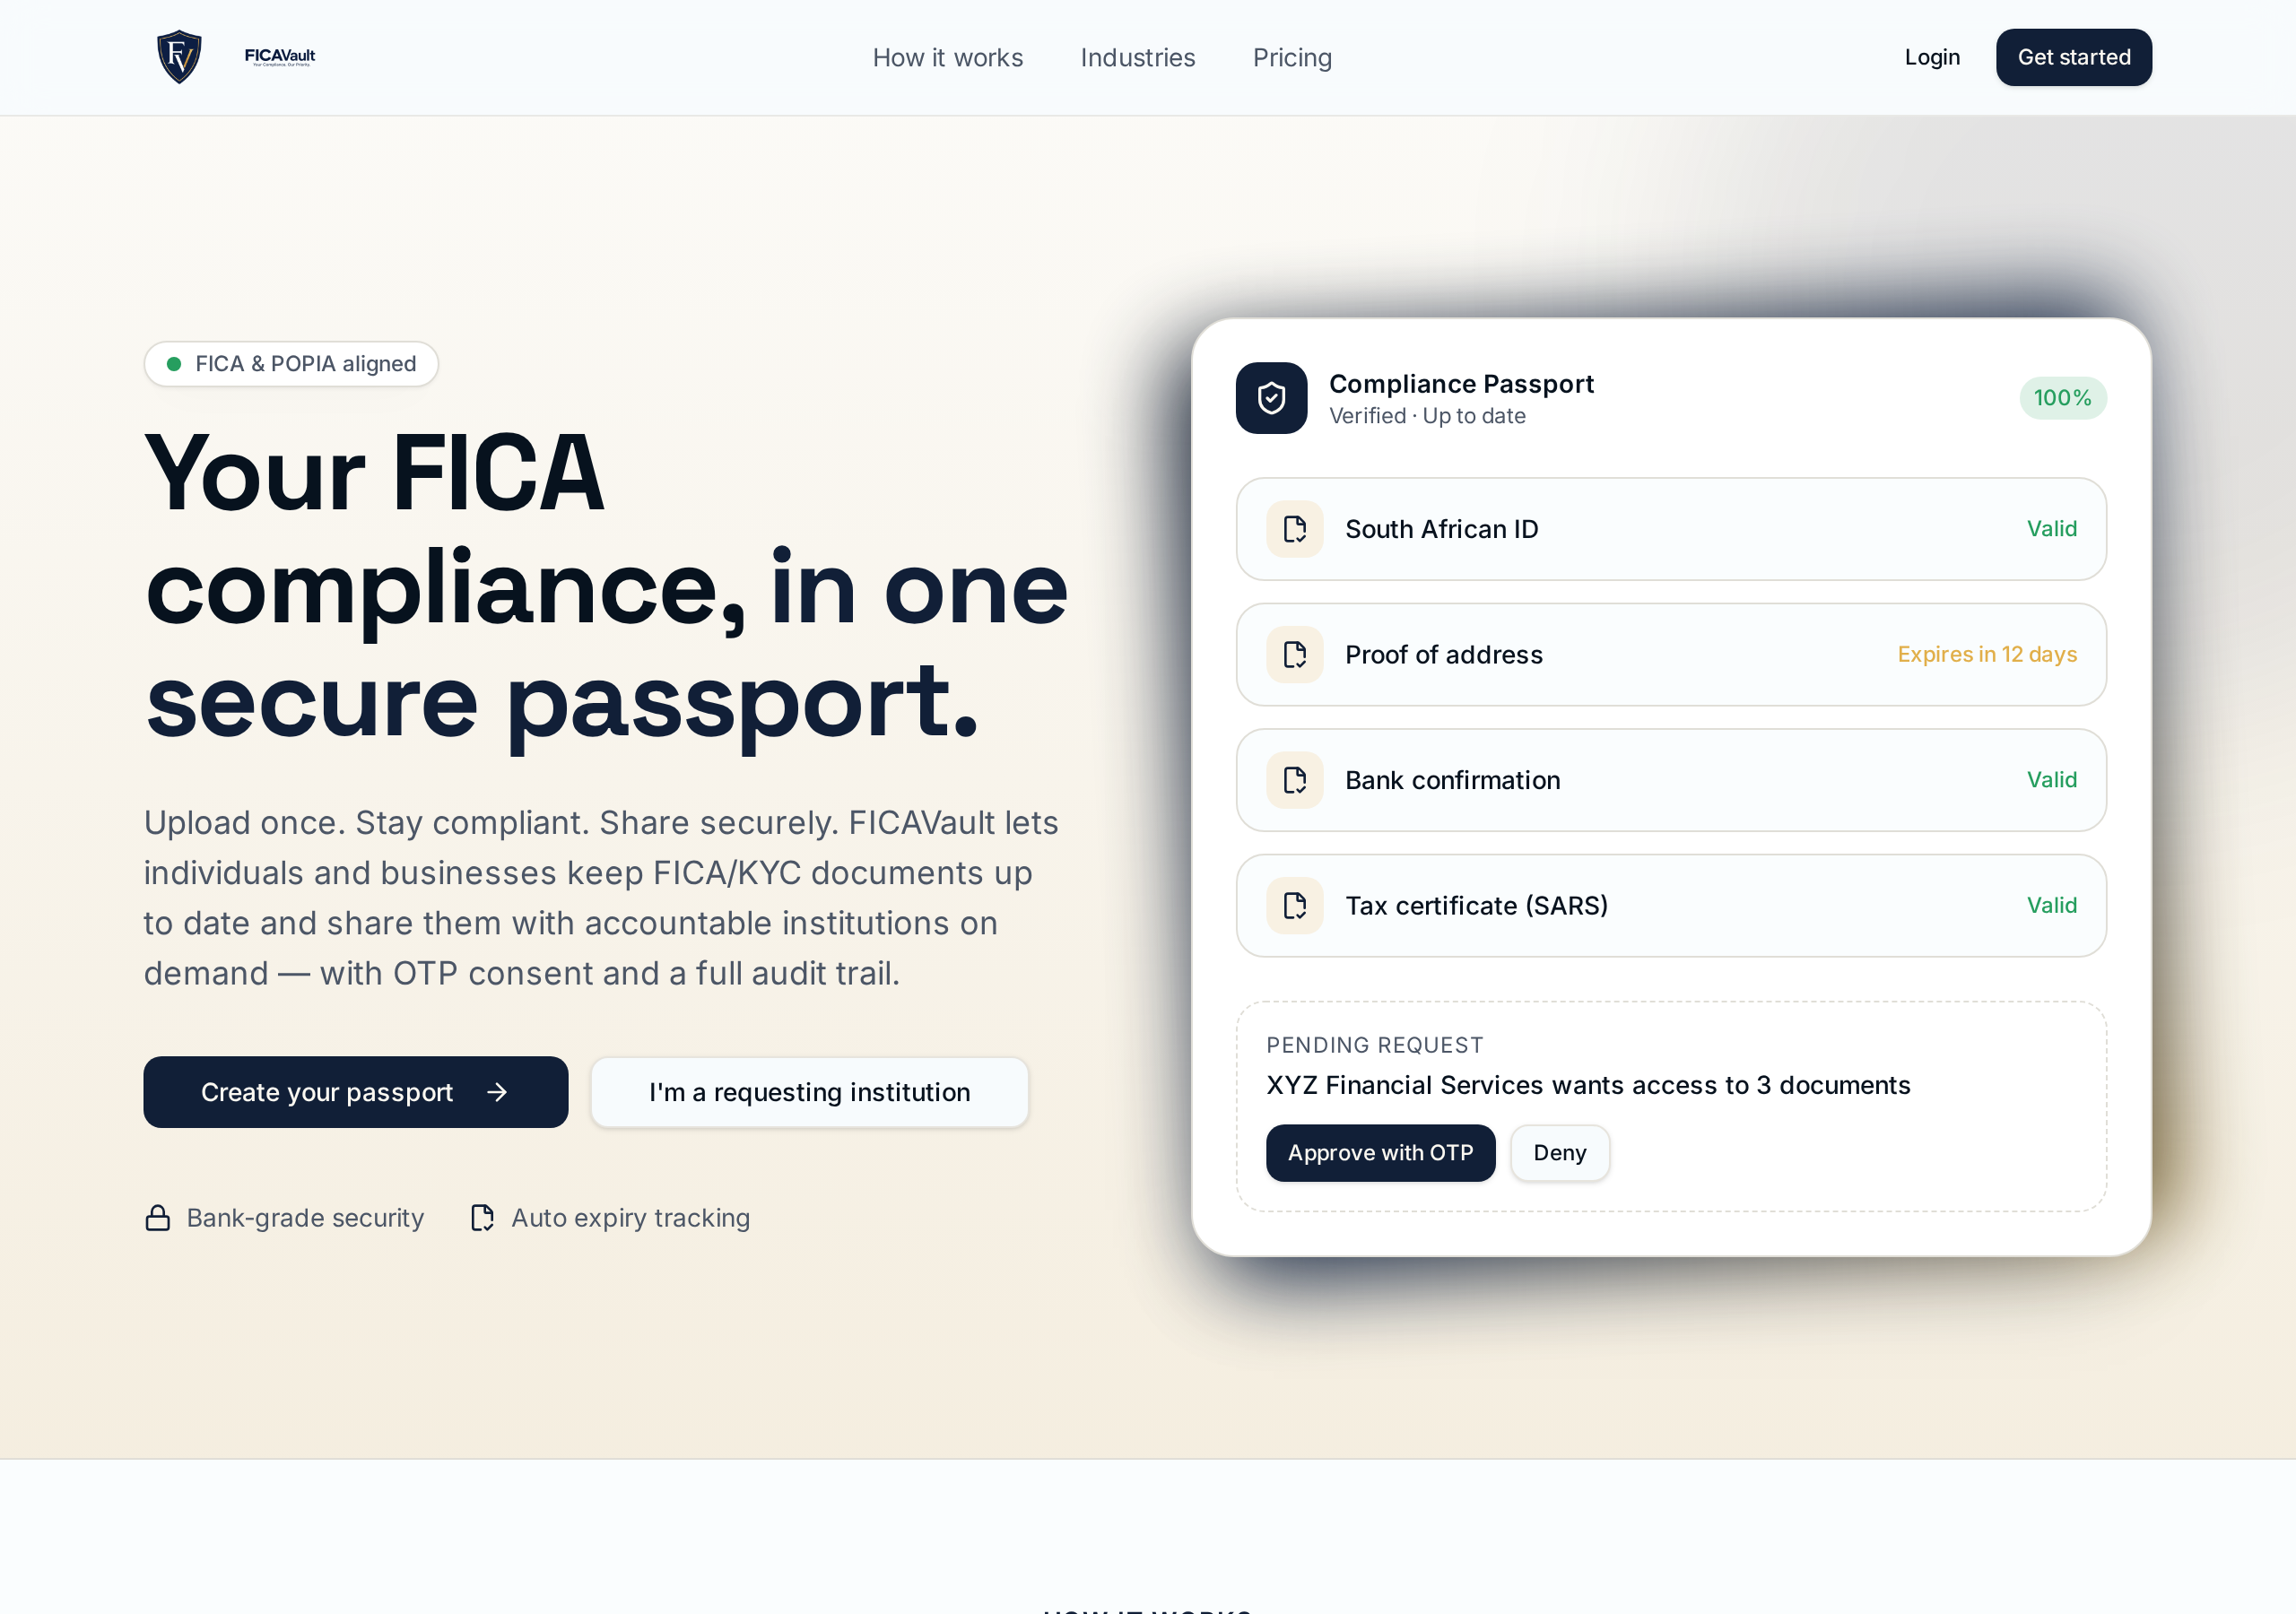
FicMe is a compliance passport for South African individuals and businesses. Upload your FICA/KYC documents once, keep them current with automatic expiry reminders, and share them securely with banks, advisors, attorneys, accountants, brokers and other accountable institutions only when you explicitly approve.
Everything in the web app is also in the free iOS and Android apps, plus native features: Face ID / Fingerprint login, camera document capture, and the OS share sheet. See section 25 onwards for the mobile-only bits.
2. Key concepts
- Passport. The set of documents and structured info that make up your (or your entity's) up-to-date compliance profile.
- Entity. Any subject FicMe holds a passport for — you (individual), a company, a close corporation or a trust.
- Requesting institution. A bank, advisor, attorney, accountant, broker, dealership or asset manager that needs to see documents to comply with the FIC Act.
- OTP consent. A one-time password sent to your verified email or mobile that you must enter to approve a share.
- Share link. A signed, passcode-protected, time-limited URL you generate to disclose specific documents to a named recipient.
- Identity verification. Our AI cross-checks the ID / passport you typed against the actual document you uploaded. Green tick = verified.
- Audit log. An immutable, time-stamped record of every request, approval, denial, download and revocation.
3. Choosing your account type
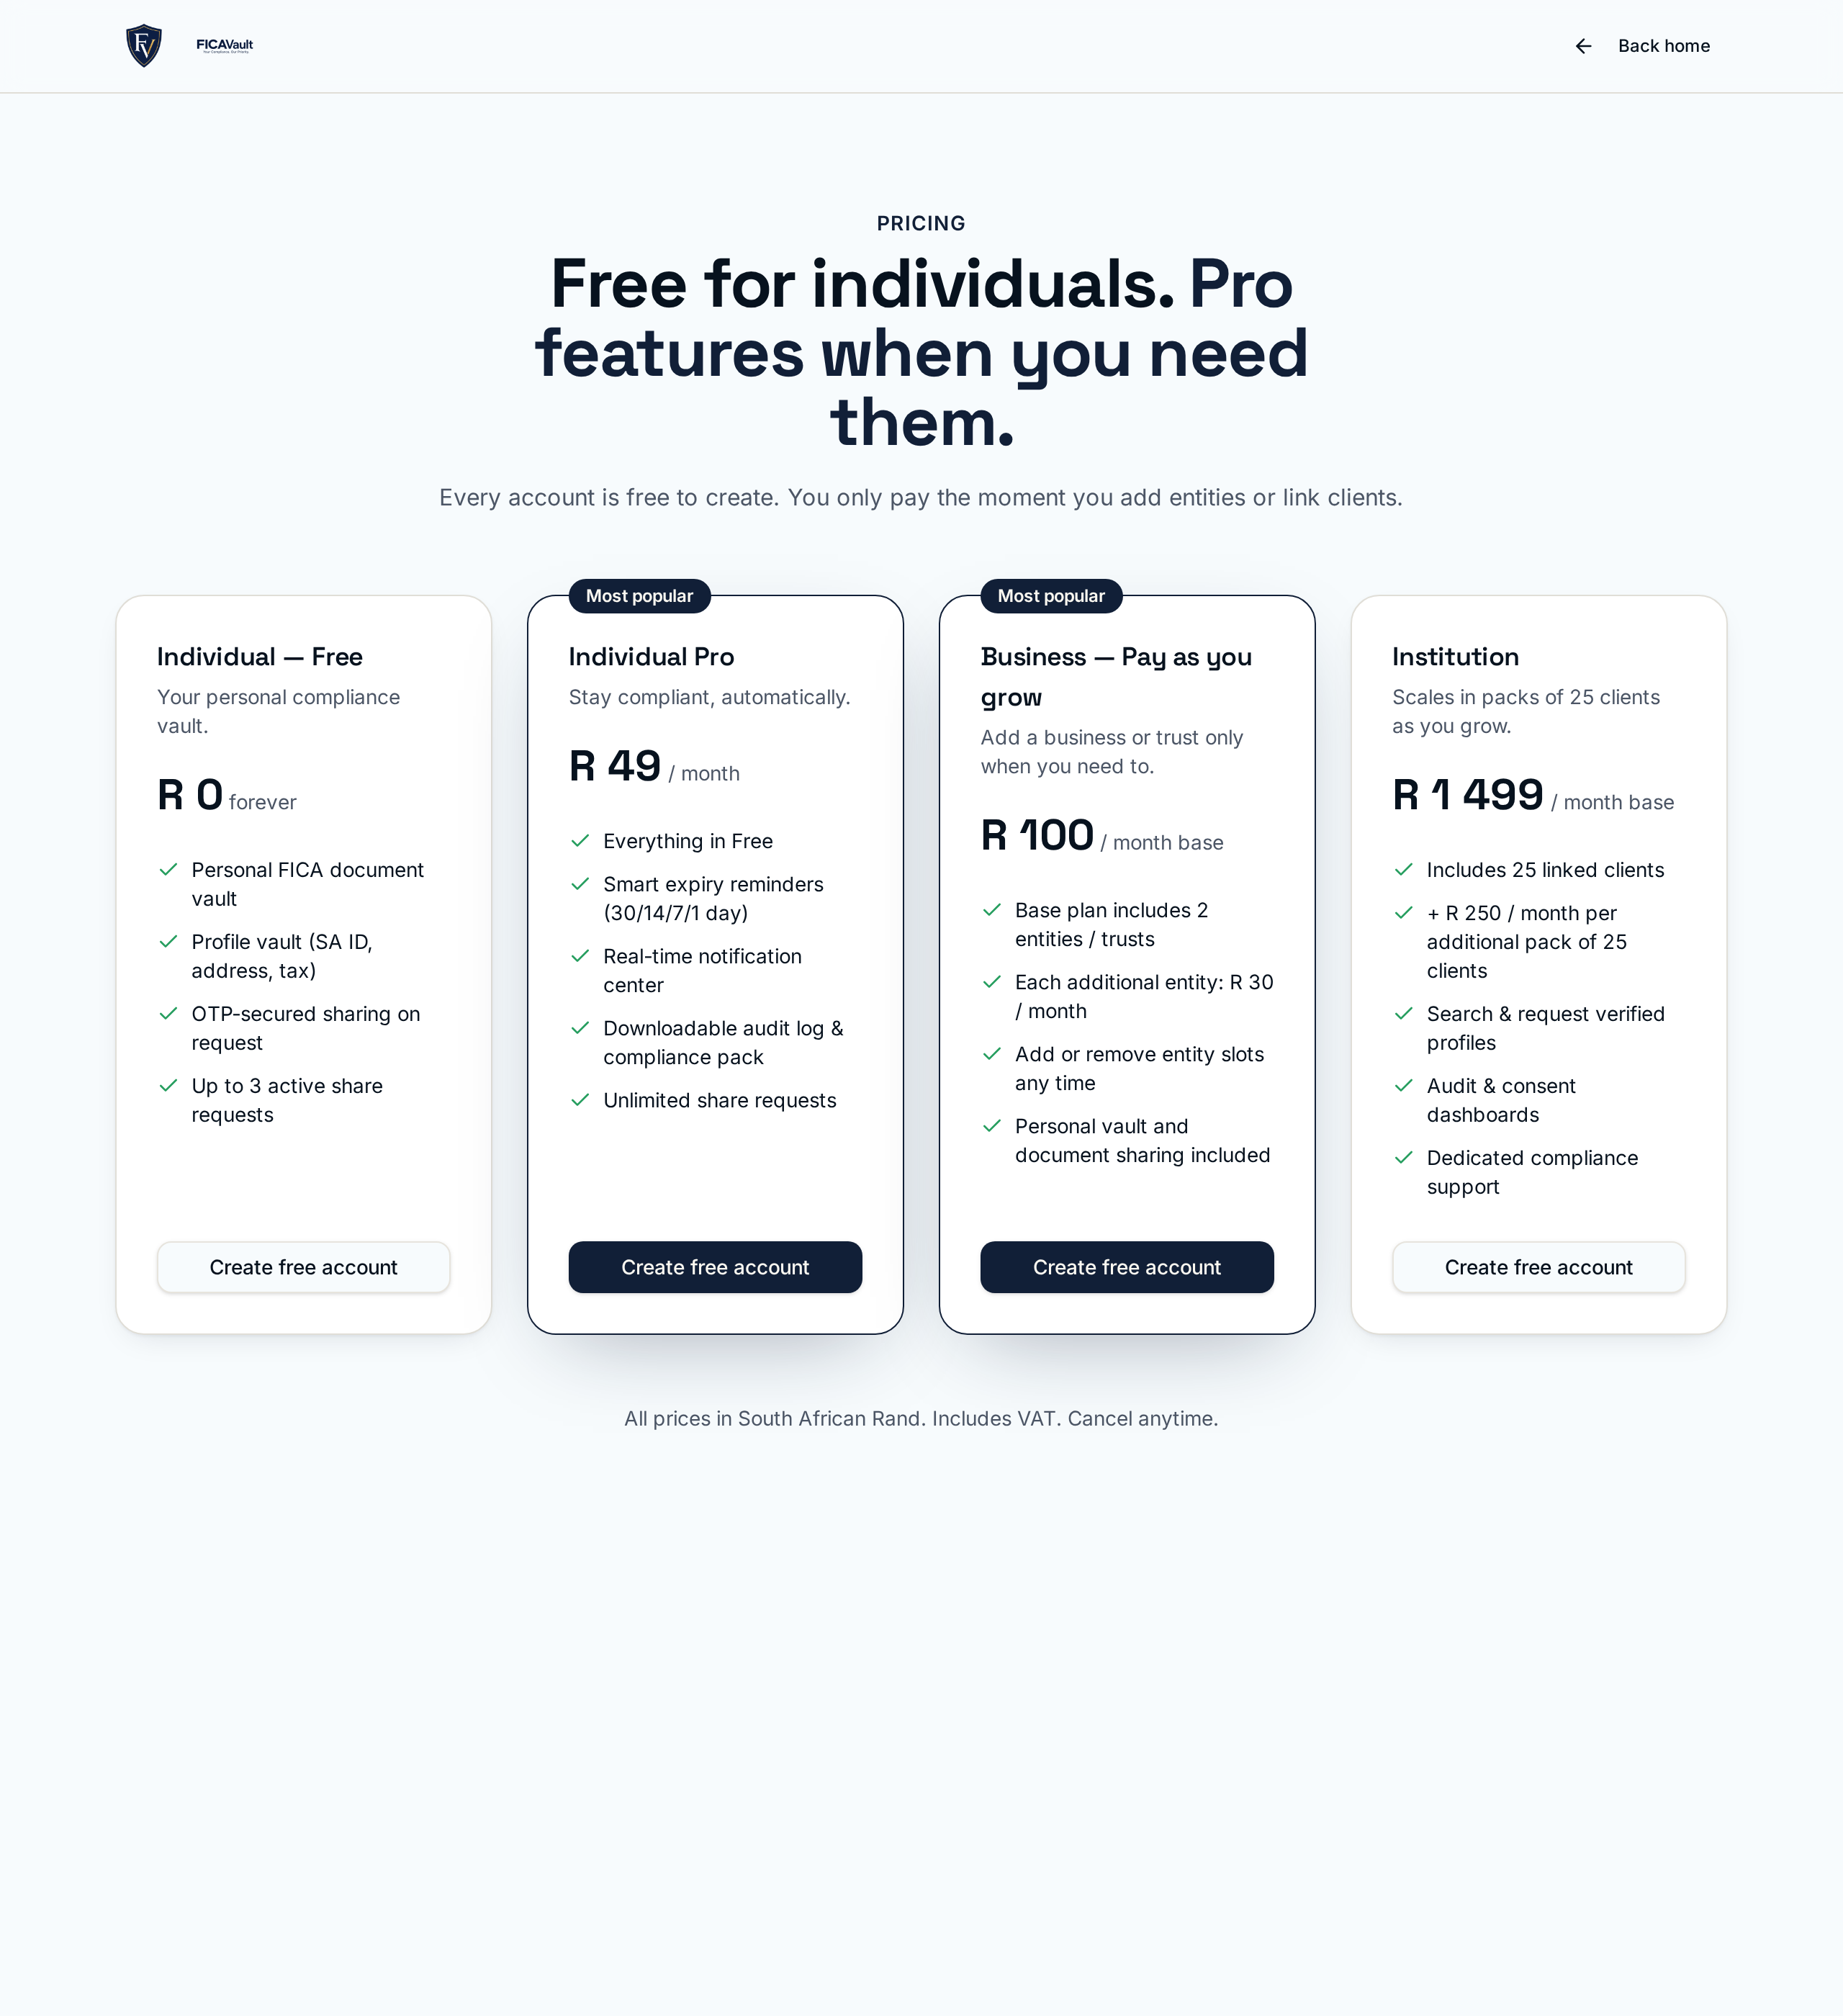
Every account is free to create. You only pay when you add a business, trust or linked client.
| Type | Best for | Pricing |
|---|---|---|
| Individual | One person building a personal FICA passport. | Free forever. Pro adds notifications, audit export and AI autofill at R 49 / month. |
| Business | Companies, close corporations and trusts with directors and beneficial owners. | Free to explore. R 199 / month unlocks 2 entities, +R 49 per extra entity. |
| Institution | Banks, advisors, attorneys, accountants and other accountable institutions. | Free to explore. R 3 999 / month covers 25 linked clients, +R 250 per extra 25. |
4. How to sign up
Signup takes under a minute and no card is required.
Open the signup page
Click Get started anywhere on the site, or go directly to /auth/signup. In the mobile app, tap Create account below the login form.
Pick your account type
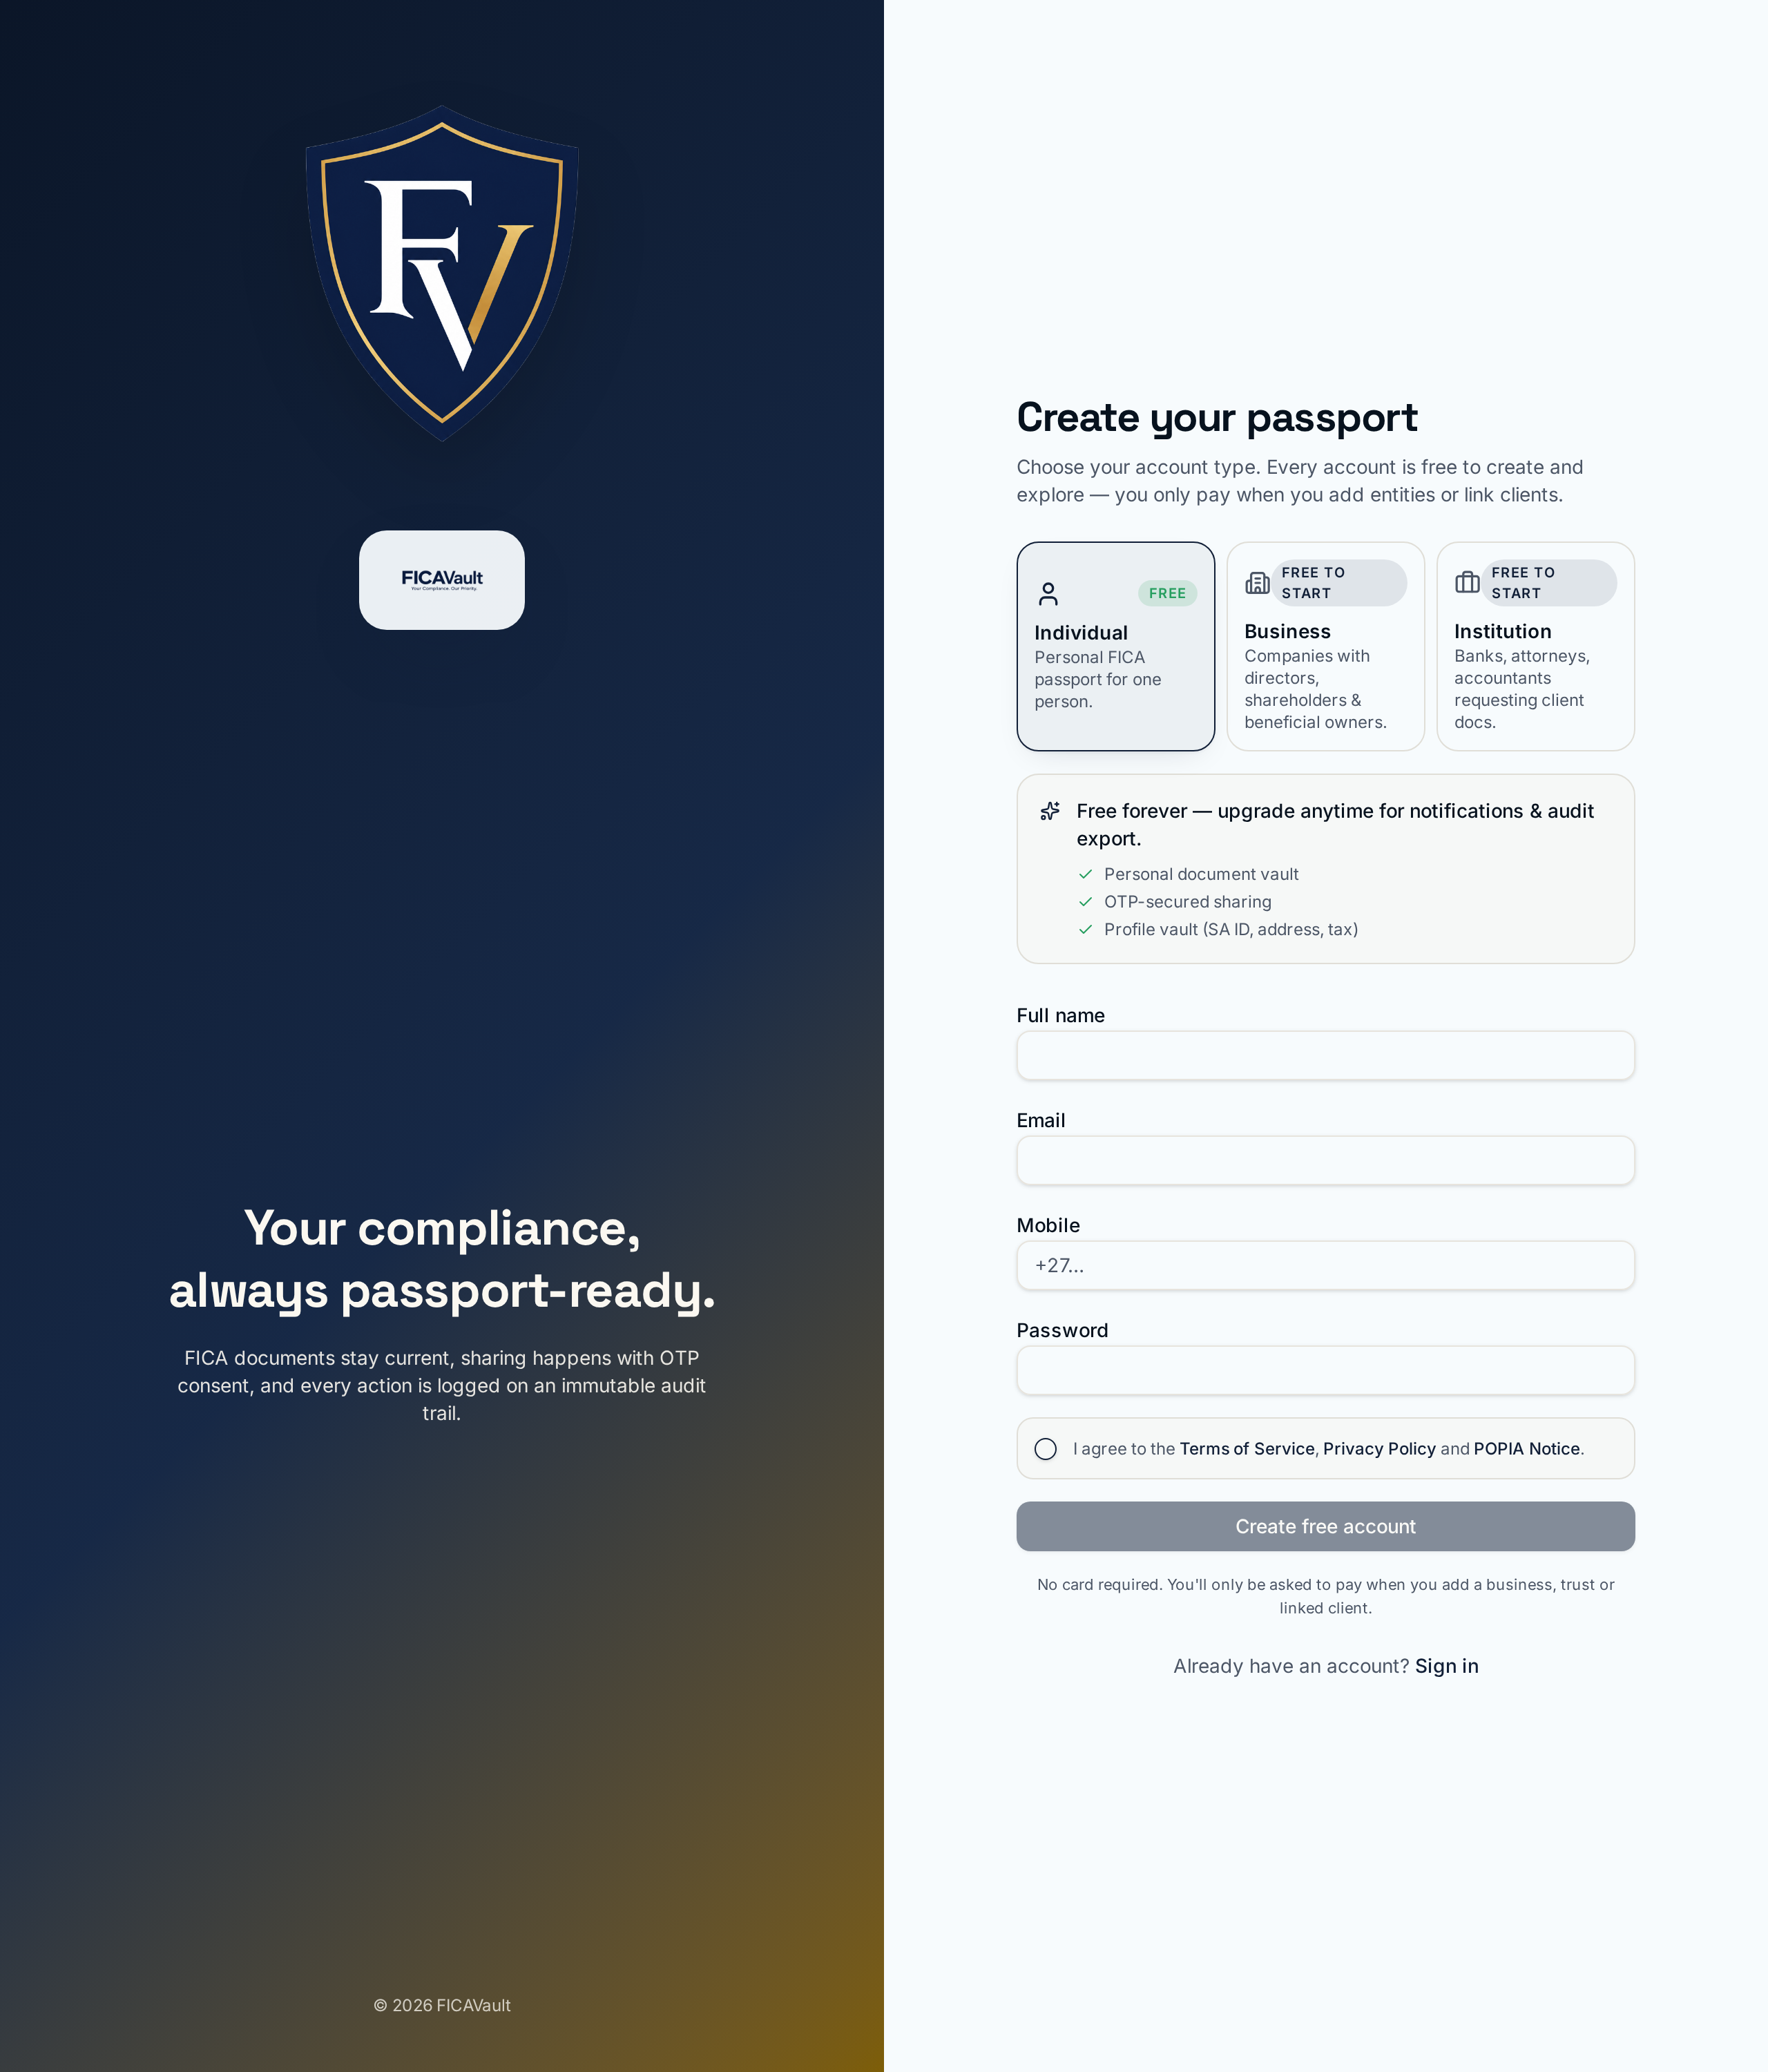
Choose Individual, Business or Institution. The description and pricing update to match. You can upgrade Individual → Business later from Billing.
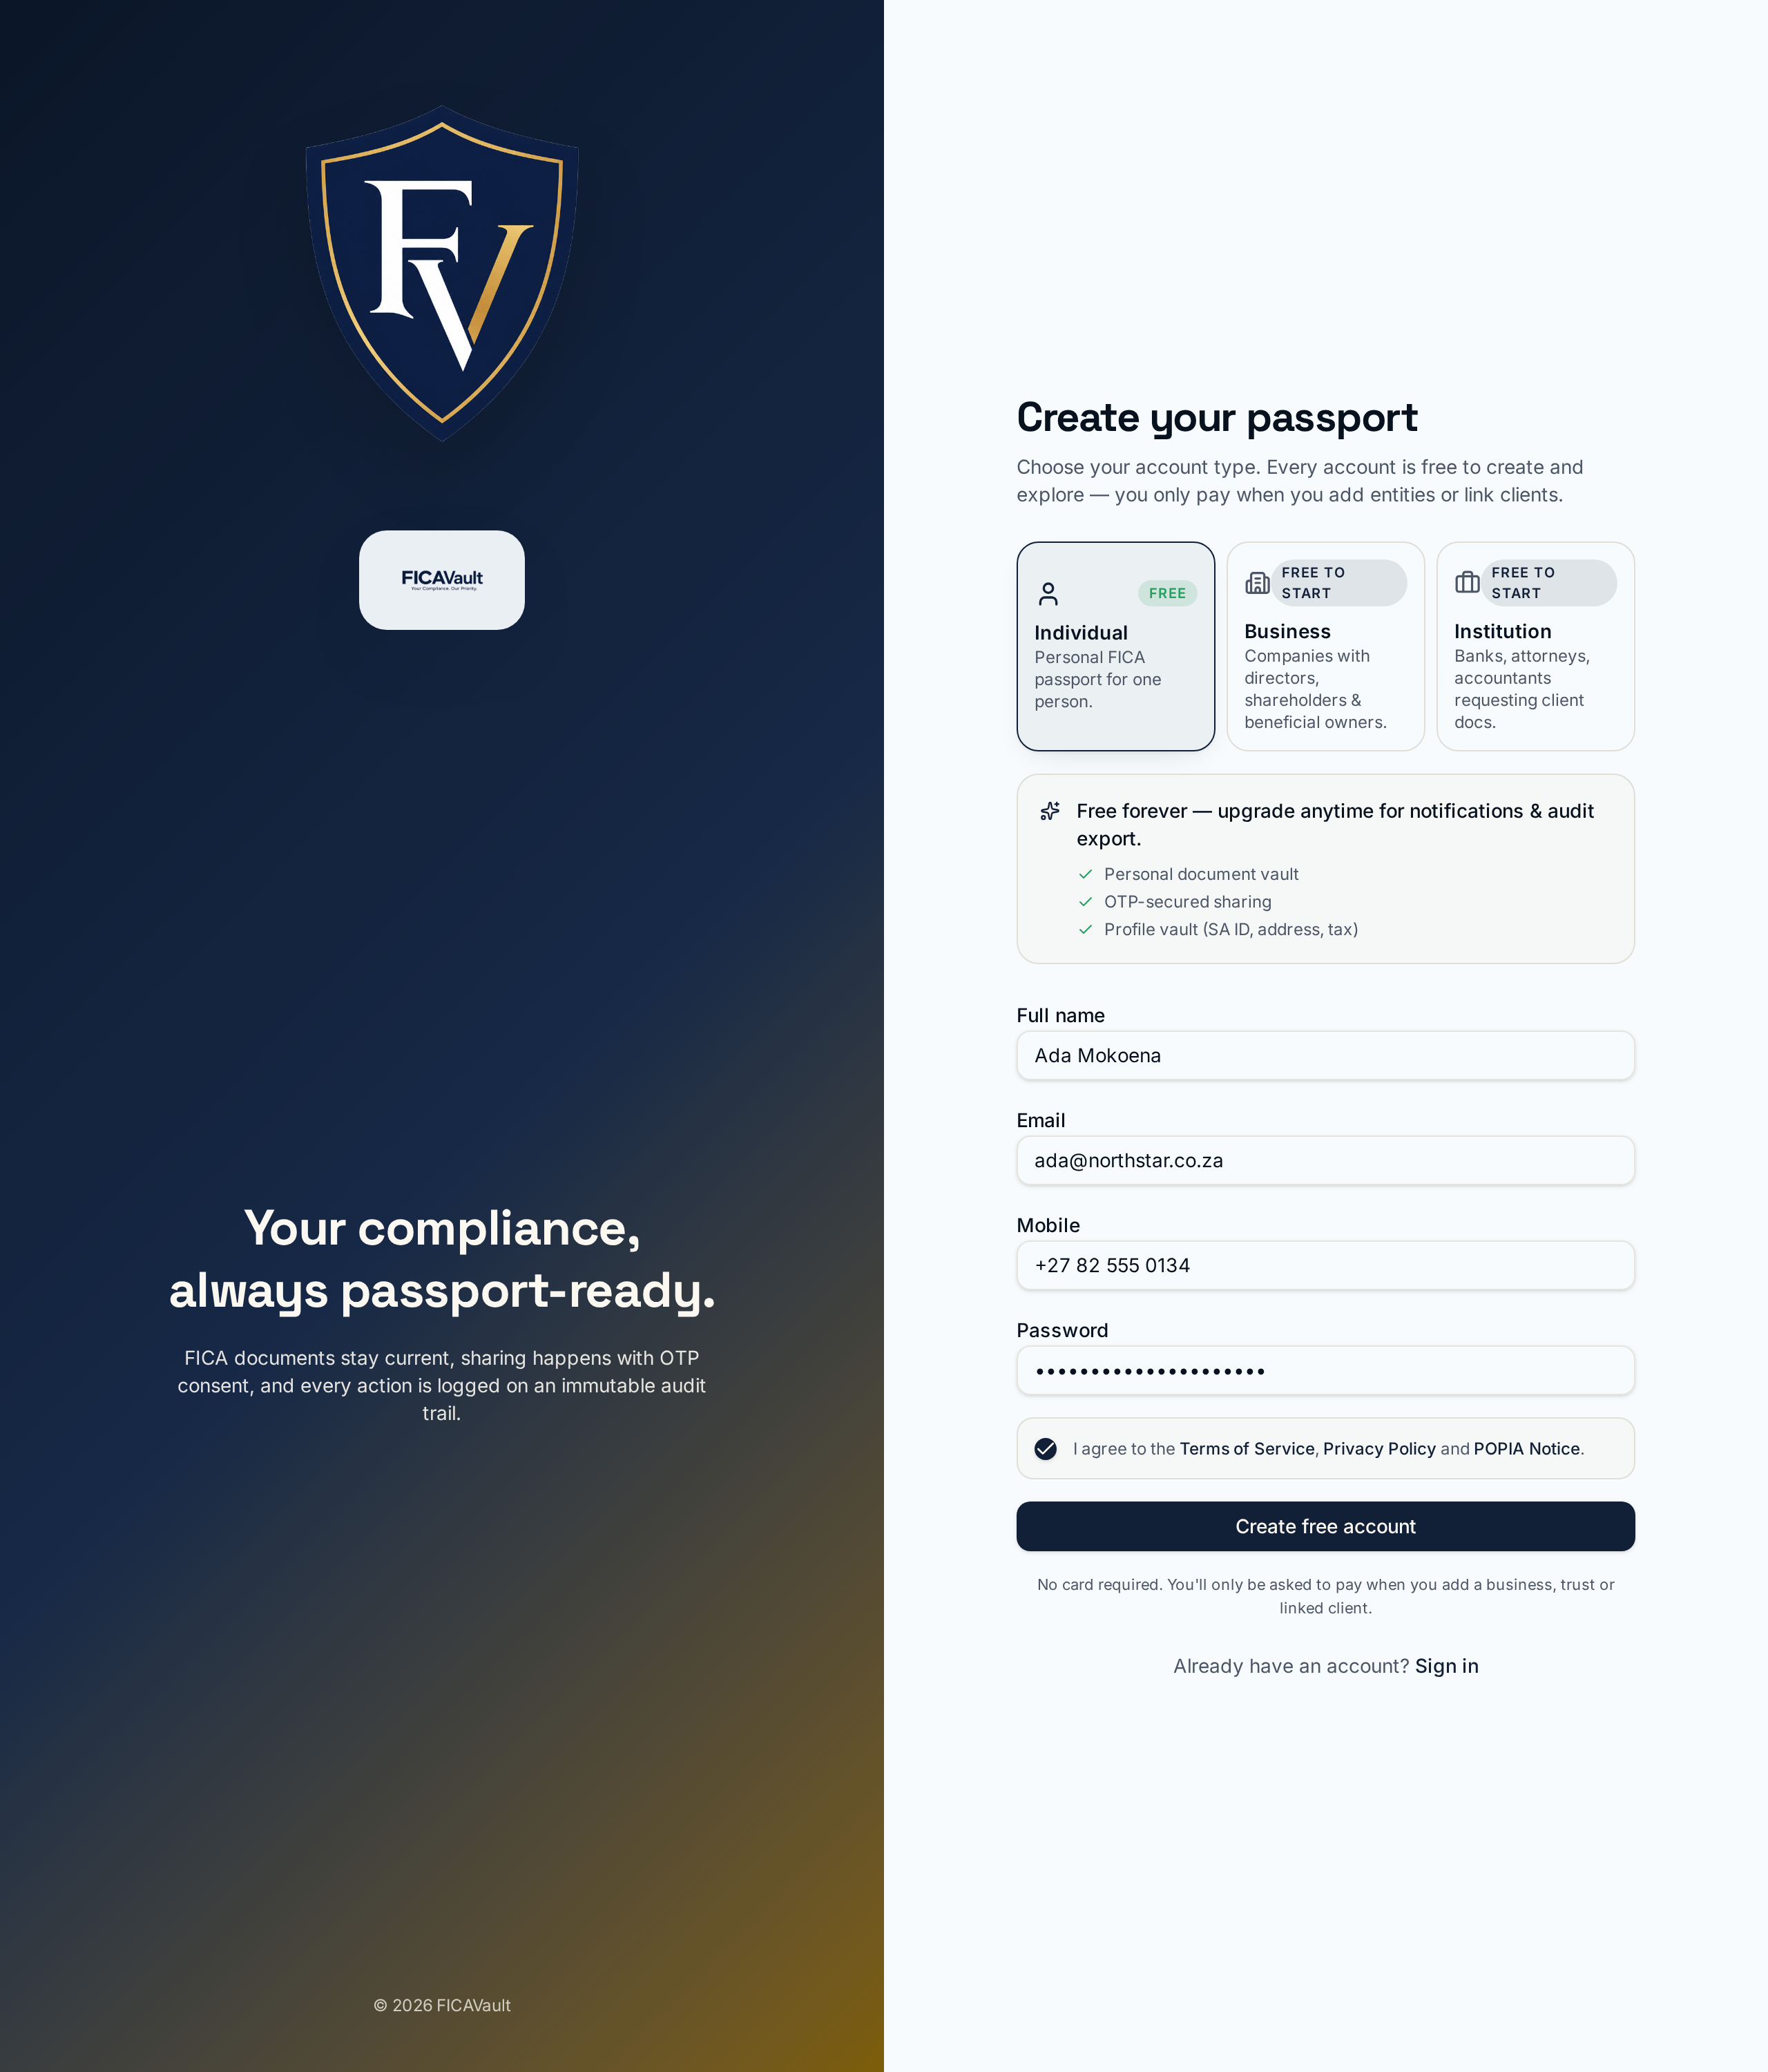
Fill in email, mobile and password
We deliberately don't ask for your name at signup — that comes from onboarding so it stays consistent everywhere (your name on the dashboard, on the audit log and on the compliance PDF matches the name on your ID).
Agree to the legal terms
Tick the box to accept the Terms of Service, Privacy Policy and POPIA Notice. Create free account unlocks once ticked. We store the timestamp of your acceptance.
Or sign up with Google / Apple
Tap Continue with Google or Continue with Apple for a one-tap signup. On the iOS app, Sign in with Apple uses the system prompt; on Android and web, Google opens in the system browser so your saved passwords / Face ID autofill work.
5. The confirmation email
Within a minute of signup you'll receive an email from no-reply@ficme.app with the subject Confirm your email for FicMe.
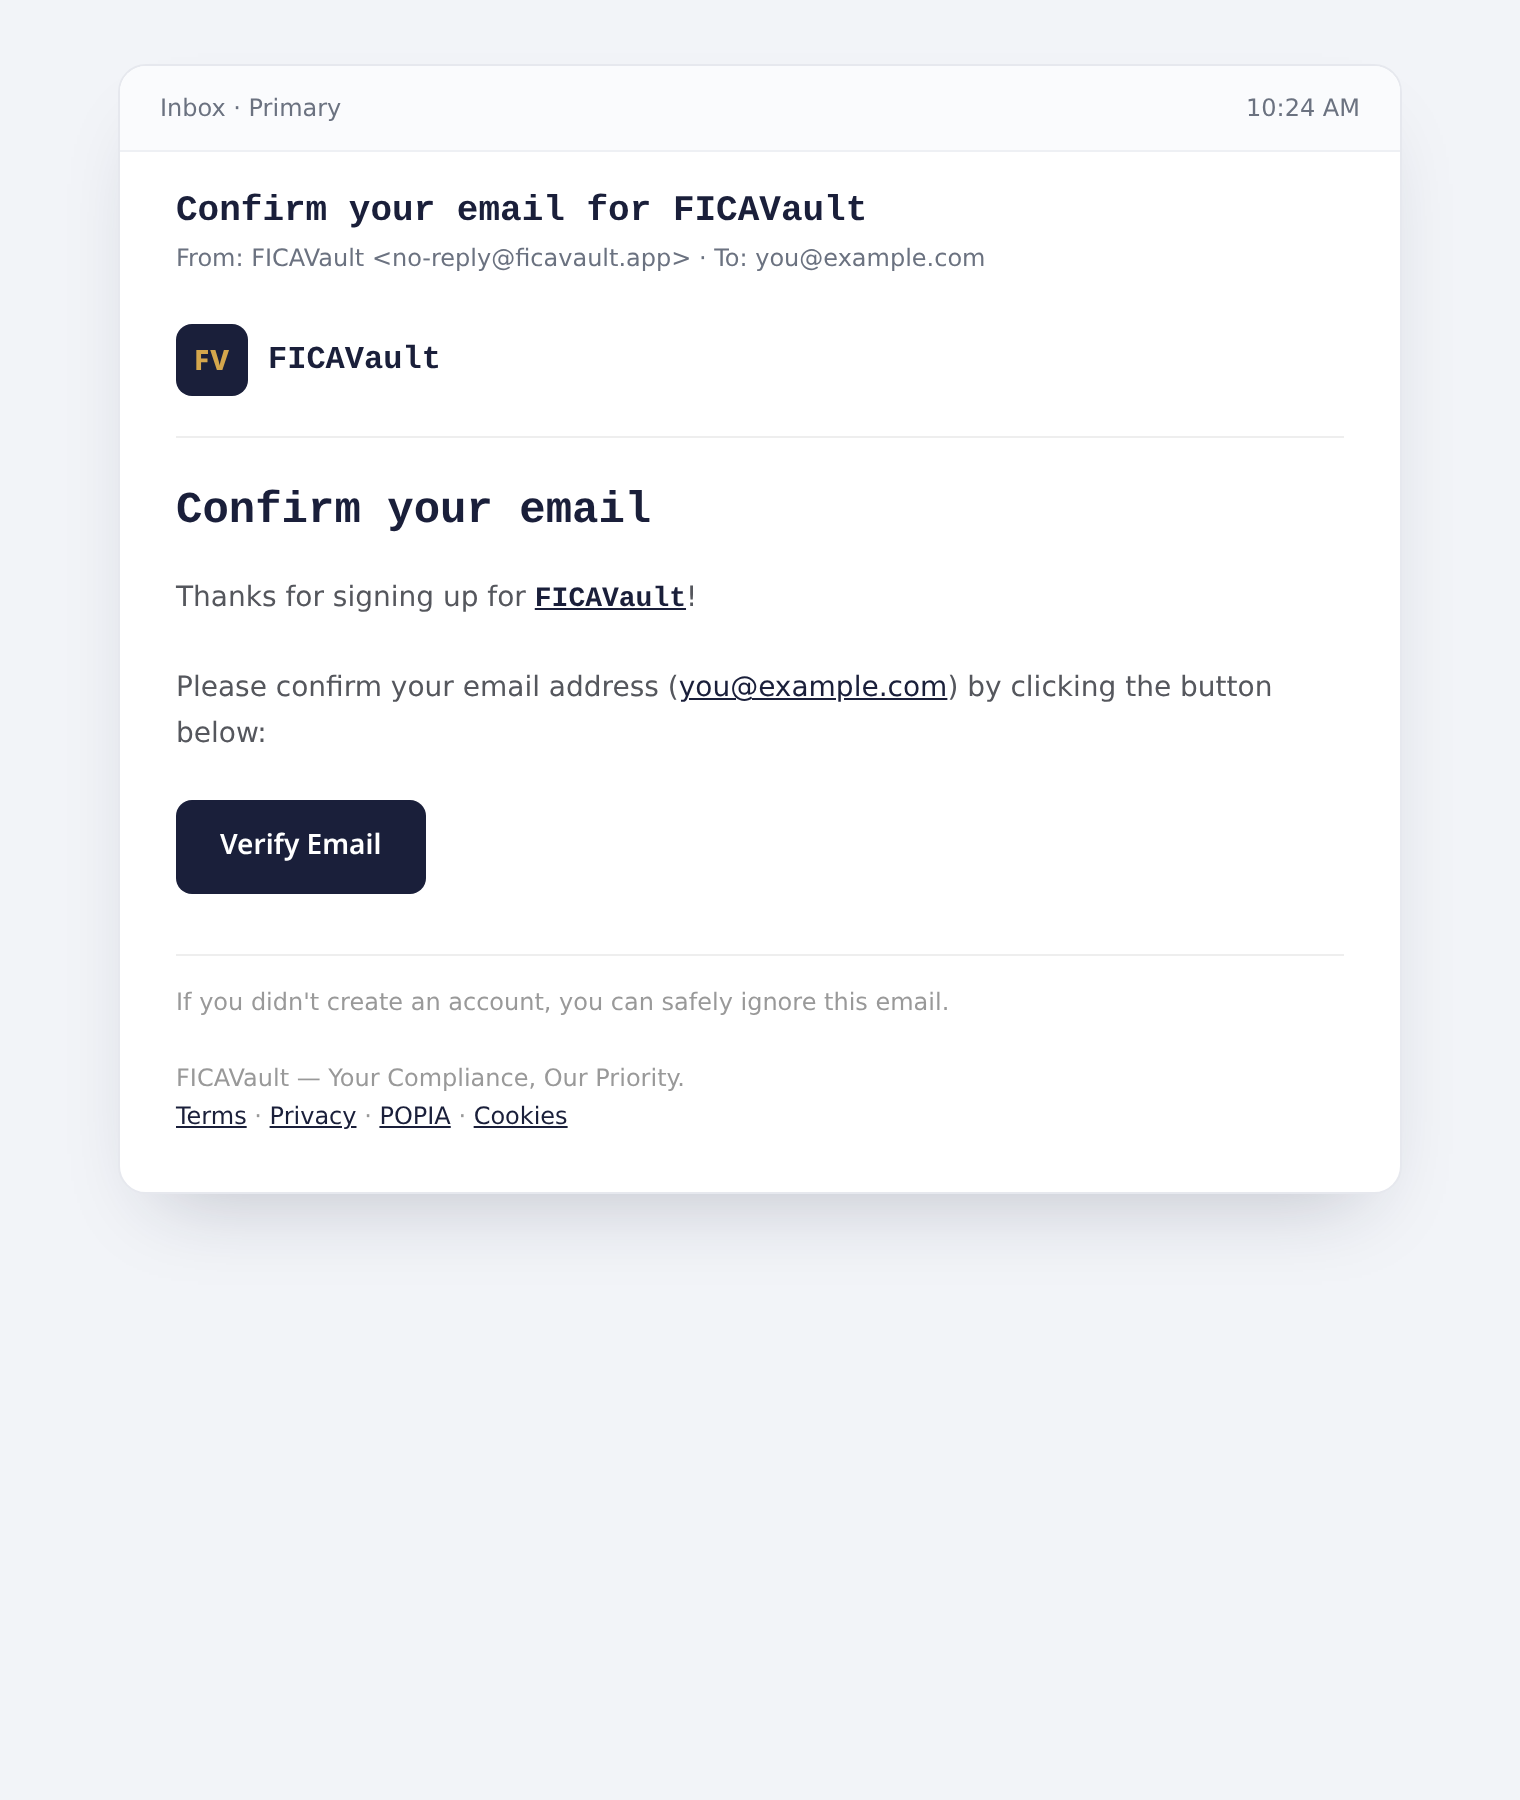
Click Verify Email — you'll be redirected straight into your dashboard.
6. First login & password reset
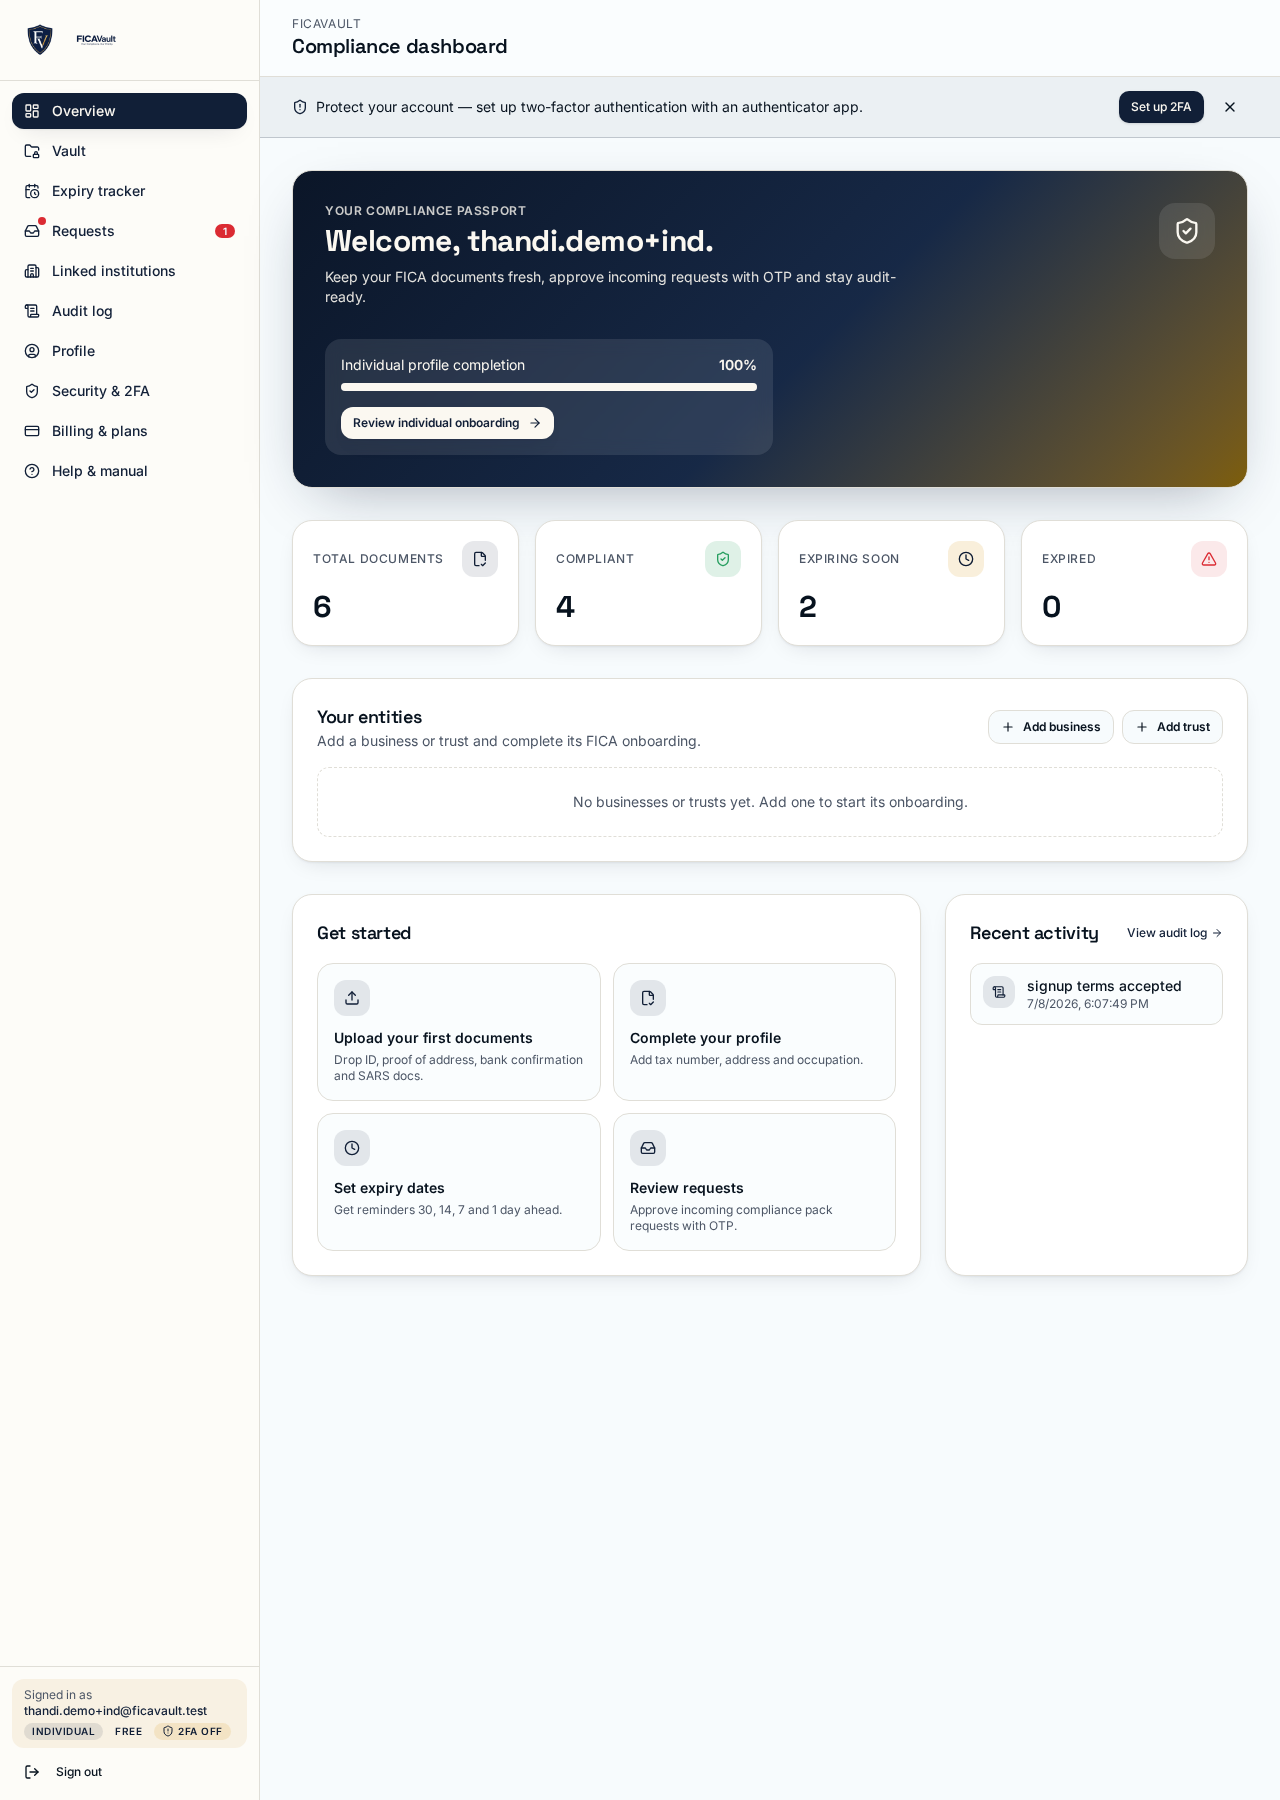
On first login you land on the dashboard with the onboarding wizard already open. If you close it, the Continue onboarding card on the home dashboard picks up exactly where you left off.
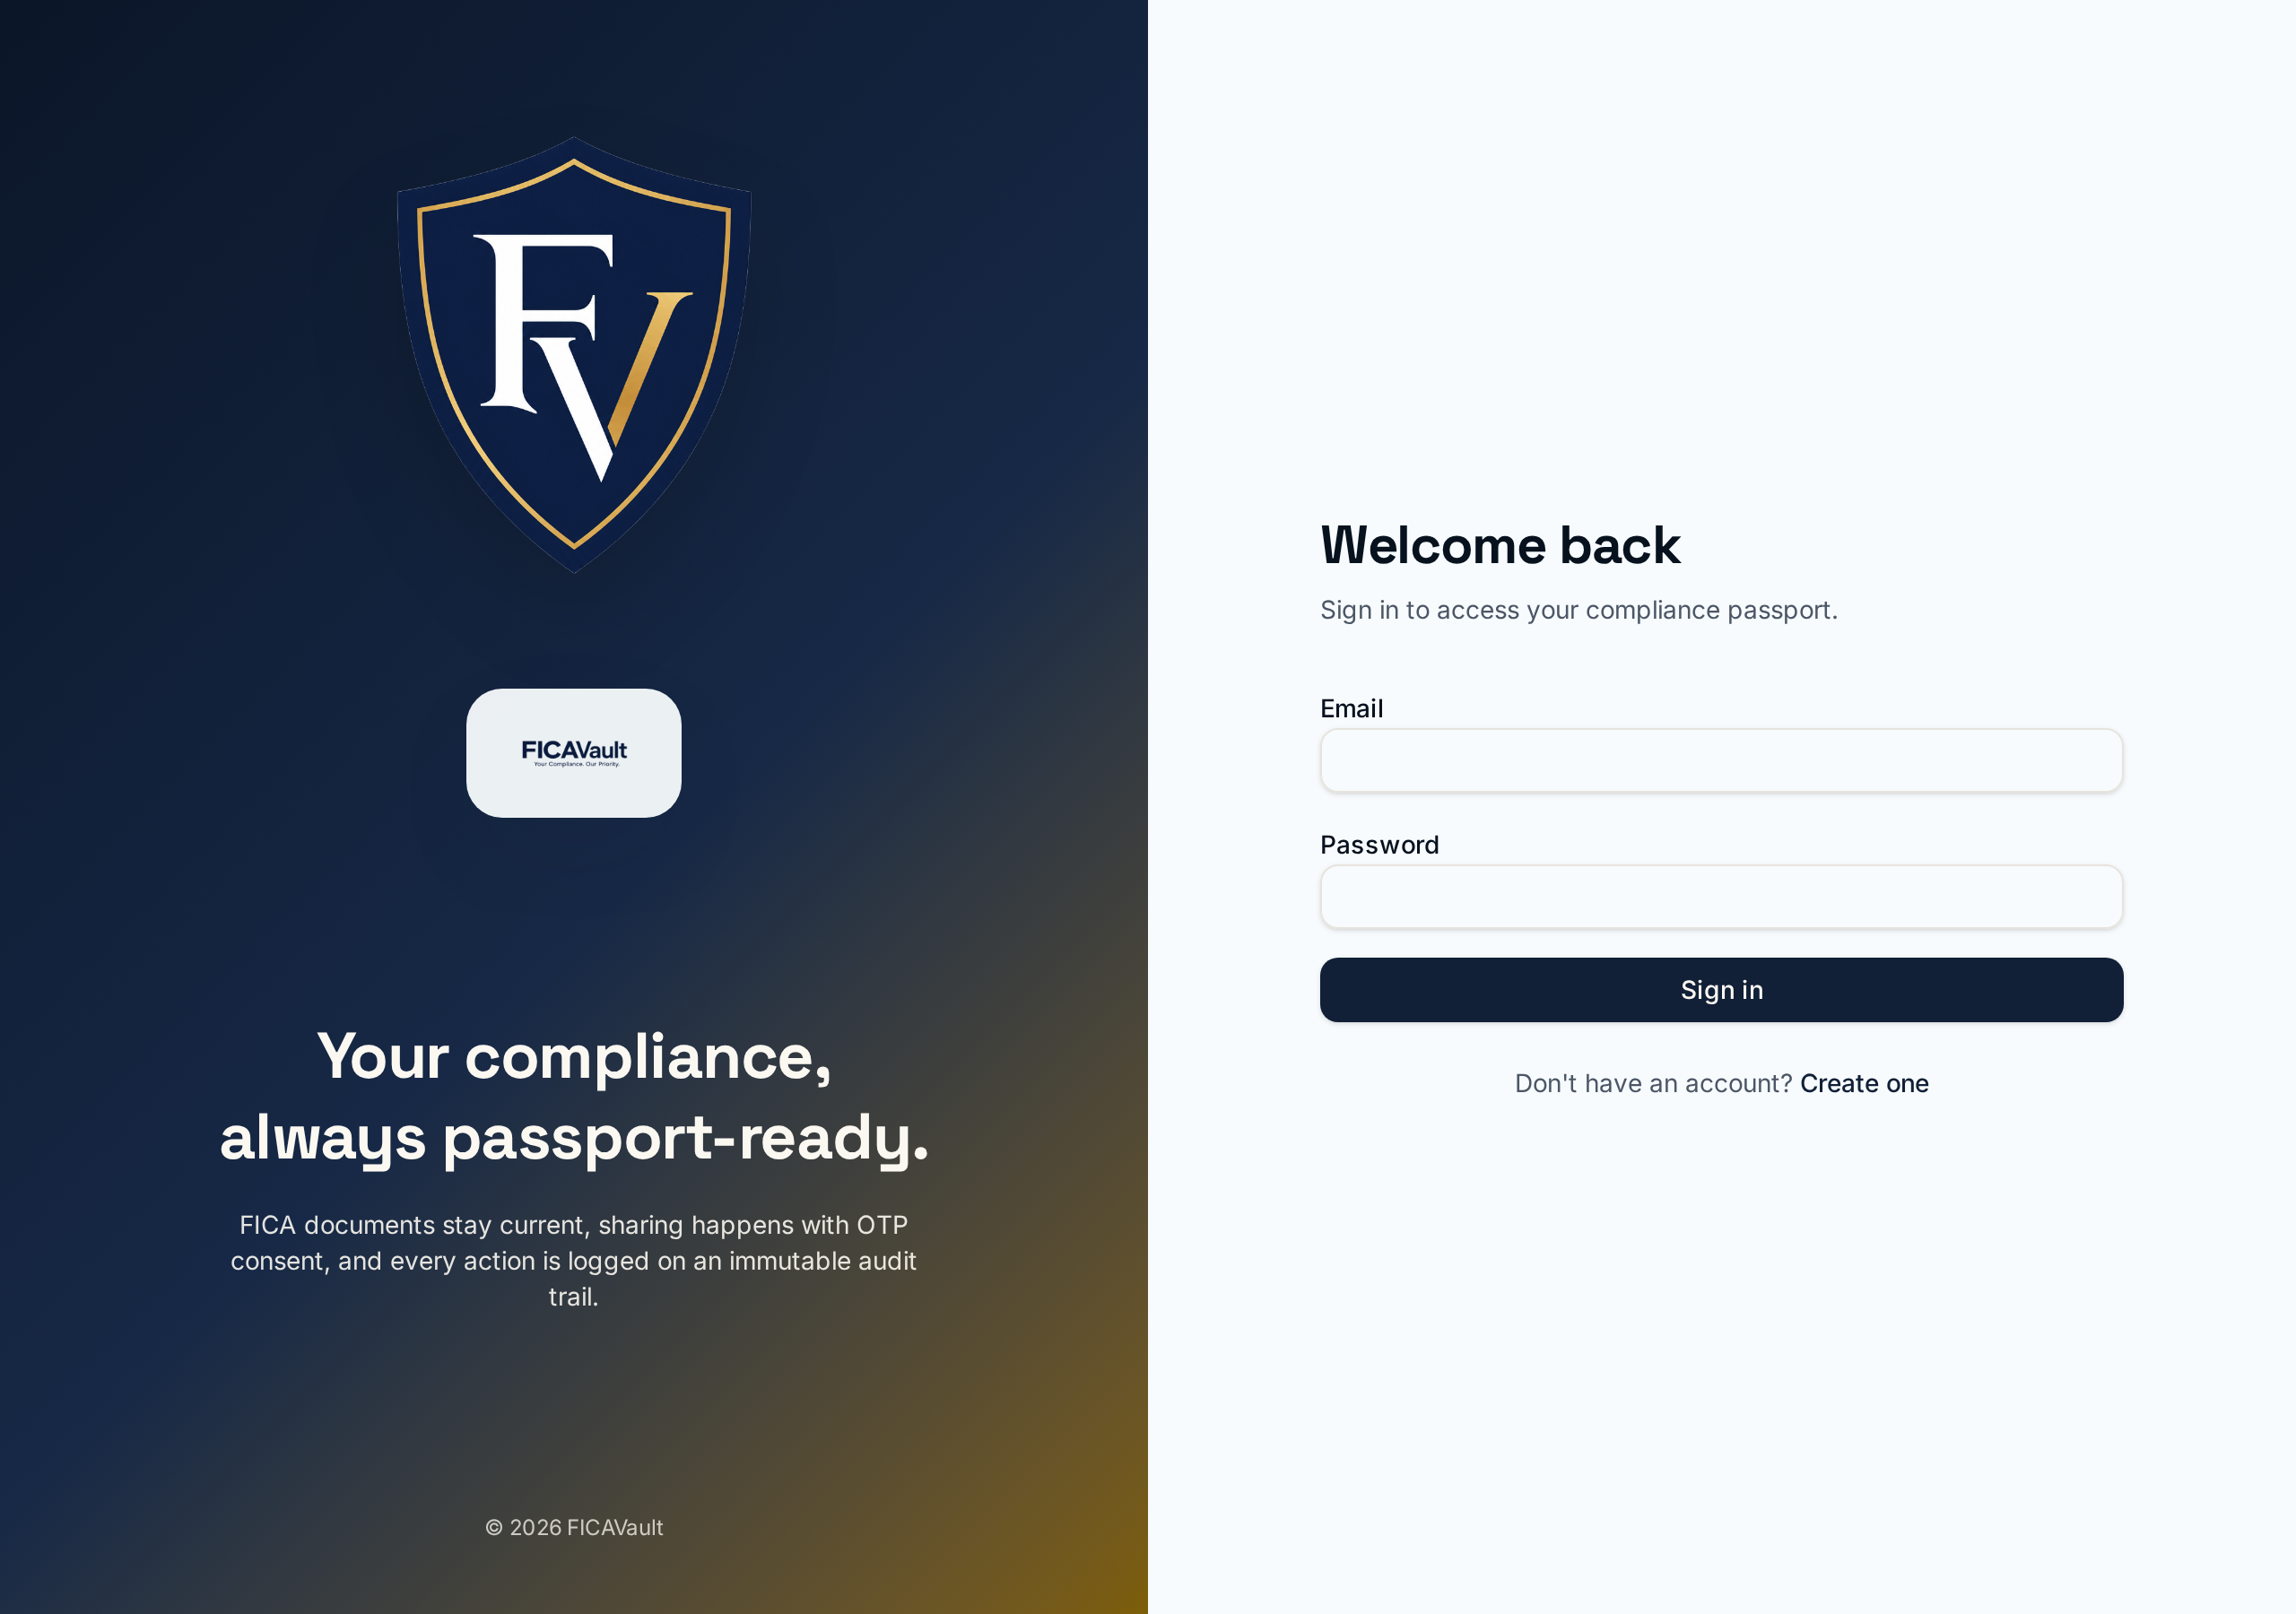
Forgot your password?
Tap 'Forgot password' on the login screen
Enter your account email. We send a recovery link to that address.
Open the email and pick a new password
The link takes you to /auth/reset-password. Enter (and confirm) a new 13+ character password. You're signed in immediately.
7. The guided onboarding wizard
After your first sign-in FicMe walks you through a wizard that builds your compliance profile. You can leave and return at any time — every field is saved as you go. The step tabs at the top let you jump directly to any step, in any order.
The steps for an individual are:
- Identity — title, nationality, name, SA ID / passport, occupation.
- Contact — verified mobile and email for OTP delivery.
- Address — residential and postal, with SA address autocomplete.
- Tax — SARS tax number and, if applicable, PAYE reference.
- Applicable documents — tick which document types apply to you; the checklist adapts.
- Uploads — attach ID, proof of address, bank confirmation and any tax documents.
- Sign & finish — confirm the declaration; a signed PDF is generated and stored in your vault.
8. Autofill with AI (upload once, done)
Before you type anything, the wizard asks "How would you like to start?". Pick Autofill with document and drop in whatever you have — your green barcoded ID, smart-card ID, passport, utility bill, SARS tax notice or a bank statement. Our AI (Gemini 1.5 Flash) extracts the fields it is 90%+ confident about and pre-fills the wizard.
Choose autofill
On the first onboarding screen, tap the blue Autofill with document card. Prefer to type? Pick Enter manually — you can trigger autofill on any step later.
Upload one or more documents
Drag a file in, or on mobile tap Take photo to snap it with the camera. You can upload several at once (e.g. ID + proof of address + tax letter) and the AI merges the fields.
Review before saving
Every extracted field is shown side-by-side with the source. Nothing saves until you tap Use these values. Change anything the AI got wrong first — you always have the final say.
9. Identity verification
To stop typos and impersonation, FicMe verifies that the SA ID number (or passport) you entered actually appears on the document you uploaded.
- Luhn check on every SA ID number — an invalid ID is rejected before you even save.
- Document match — our AI reads the uploaded ID / passport and confirms the number matches.
- Status badge next to every person's name across the app: Verified (green), Pending (grey) or Mismatch (red).
- Institution requests can require verified identity — if the badge isn't green, the requesting institution sees an Identity verification required banner instead of your documents.
If the AI can't find the number, you'll see an orange "No matching documents uploaded yet" banner. Upload a clearer photo of the same ID / passport and the badge flips to green within seconds.
10. Individual user guide
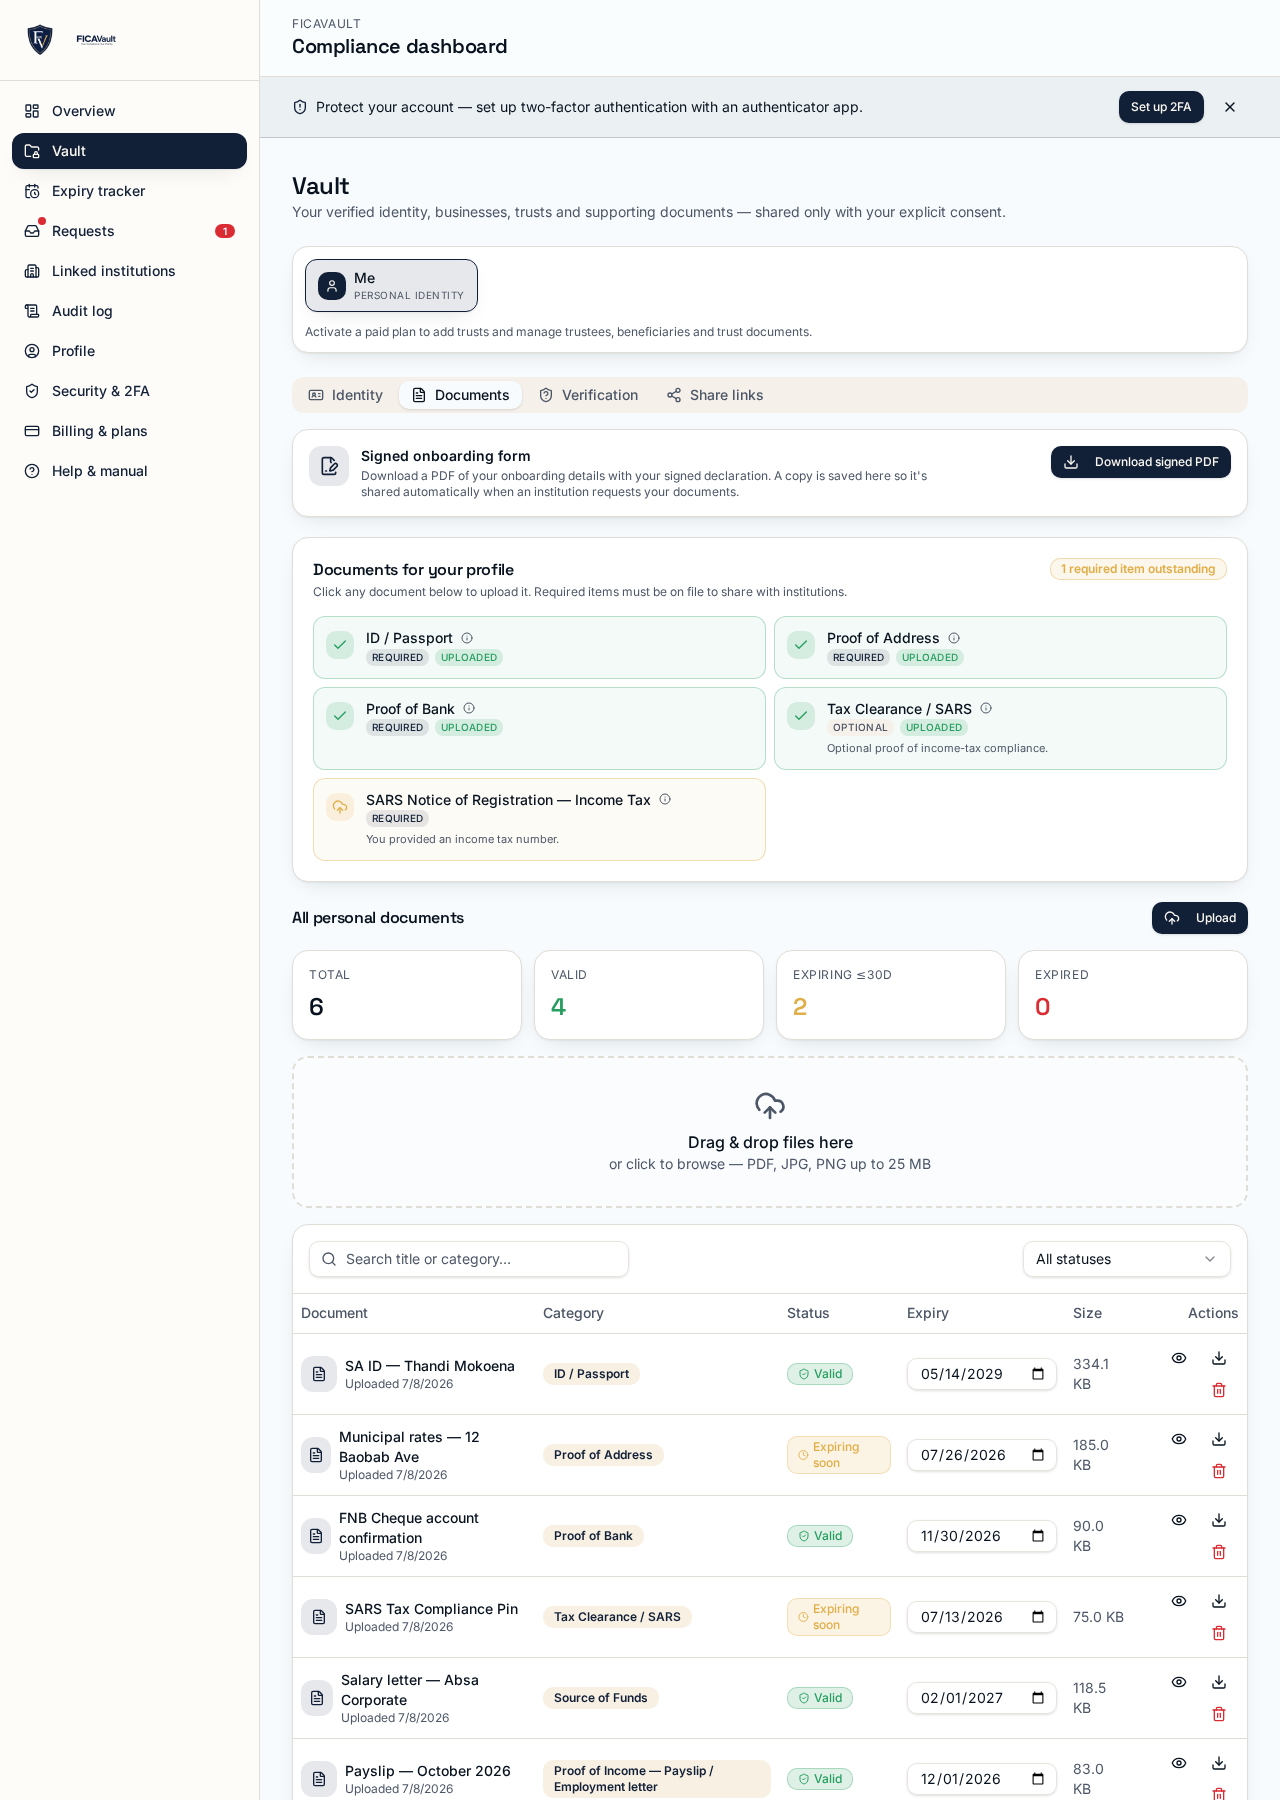
Your Individual dashboard shows: your vault, your profile, your share requests inbox, the Share page, the Notifications page and your audit log.
- Vault. Upload documents by category (ID, proof of address, bank, tax, other). Each upload is encrypted at rest. Required items are called out at the top so you always know what's still missing.
- Profile vault. The structured information — SA ID number, address, tax number — that institutions typically ask for alongside documents. Available at Dashboard → Profile.
- Requests. Any institution asking for documents appears here as a pending card. See section 15.
- Notifications. A real-time feed — request received, share opened, document expiring. Section 20.
11. Business & trusts
A Business account groups multiple entities under one owner. Each entity has its own vault, directors, shareholders, trustees and beneficial owners.
- Personal vault included. Your Individual passport is bundled with every Business account — the same "identity" is used for you as a director.
- Adding an entity. Go to Dashboard → Organisation → Add entity. Pick Company, Close corporation or Trust. Billing begins with the first entity — up to 2 covered by the R 199 base, then R 49 / entity.
- Trusts support natural-person and juristic trustees/beneficiaries — you can link a company as a trustee the same way you'd link a person.
- Shared entity vault. Company docs (registration, resolution, bank letter, tax number, BO register) live in the entity vault; personal docs stay with each individual.
- Ownership % for shareholders is clamped to 0–100 and enforced across the entity.
On the web
Dashboard → Organisation
In the mobile app
More → Organisation
12. Linking directors, shareholders, trustees & beneficiaries
Every person (or company) attached to your entity must be linked, so their FICA documents flow through to the entity's compliance pack. The flow is the same across directors, shareholders, members, trustees and beneficiaries.
Search FicMe
Type an ID number, passport, registration number or name. If they're already on FicMe, tap them to link.
Or invite by email
If they're not on FicMe, enter their email — we send them an invite. Once they sign up and complete their own identity, the link auto-completes and their docs flow into your entity.
Consent (or auto-link)
The other person must approve being linked to your entity (except if you're linking yourself — if the ID matches your account, we skip the consent step automatically).
13. Team members (organisations)
Businesses and institutions can invite colleagues to help manage the vault.
On the web
Dashboard → Organisation → Team
In the mobile app
More → Organisation → Team
- Roles: Admin (full access, billing), Member (day-to-day: upload, request, share).
- Invite by email. The invitee gets a signup link scoped to your organisation.
- Attribution. Every action a team member takes is written to the audit log under their name.
- Removing a leaver revokes their access instantly and expires any active sessions.
14. Institution user guide
Institutions use FicMe to request documents from clients and to keep an organised, auditable record of what was collected and when.
- Linked clients. Add a client by searching FicMe, or invite by email if they're not yet a user (a blind request). R 3 999 / month covers 25 linked clients; add more in blocks of 25 for R 250 / block.
- Requesting documents. Pick an applicable-documents checklist (per client type / product) or request specific documents. See section 15.
- Request identity verification. Use the Verification panel to require a client to prove their ID / passport matches an uploaded document before you accept the pack.
- Team members. See section 13.
- Compliance pack. Export a full pack of what a client shared, when, and with which OTP consent — ready to hand to your compliance officer.
15. Document requests (Institution → Client)
A request has a clear lifecycle so both sides always know where they stand:
Pending
Institution has requested docs. Client sees a card in their inbox and gets an email.
Approved (OTP)
Client entered the OTP. Institution can now view the specific documents that were approved — nothing else.
Denied
Client declined. Institution can send a new request with a reason, or stop.
Accessed
Institution downloaded or viewed a document. Timestamp and IP are logged.
Expired
Approval window elapsed. Institution must request again.
Revoked
Client withdrew consent. Institution loses access immediately.
16. Approving or denying a request (client side)
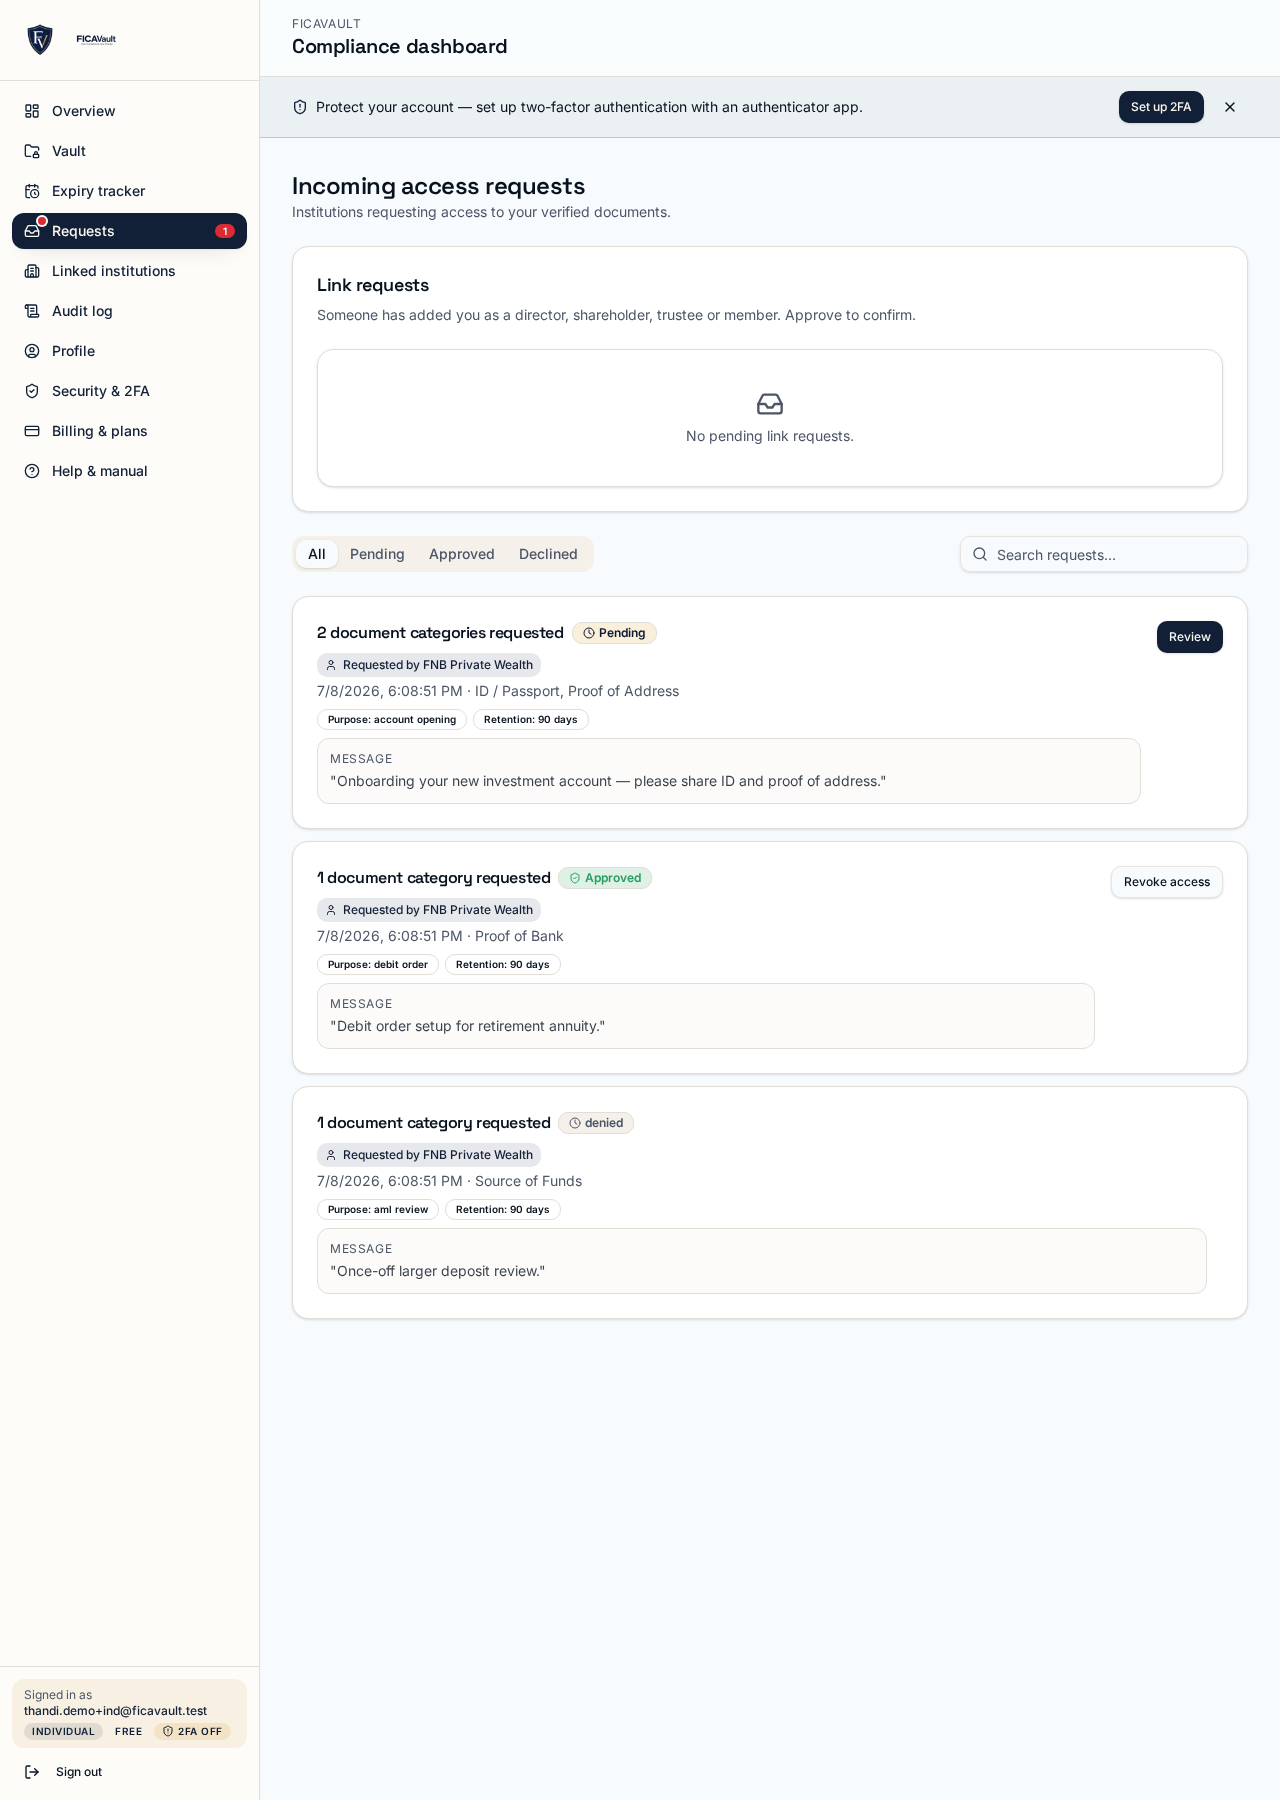
When an institution requests documents, you see a card in your Requests inbox with the institution name, the documents they want and any note they added.
Open the request
Tap the pending card. You'll see exactly which documents they want and can untick anything you don't want to share.
Approve or deny
Approve triggers OTP consent (section 17). Deny asks for an optional reason — the institution sees your response but never sees your documents.
Revoke later if needed
Approvals can be revoked at any time from the same card. Access stops instantly, even mid-download.
On the web
Dashboard → Requests
In the mobile app
Tabs → Requests
17. OTP consent — how approvals work
Whenever you approve a request, FicMe:
- Sends a 6-digit OTP to your verified mobile or email.
- Requires the OTP before any file leaves your vault.
- Records the approval — with the OTP challenge, timestamp and IP — in your audit log.
- Grants the institution access to only the specific documents you approved, for a limited window.
18. Share links to an institution — step by step
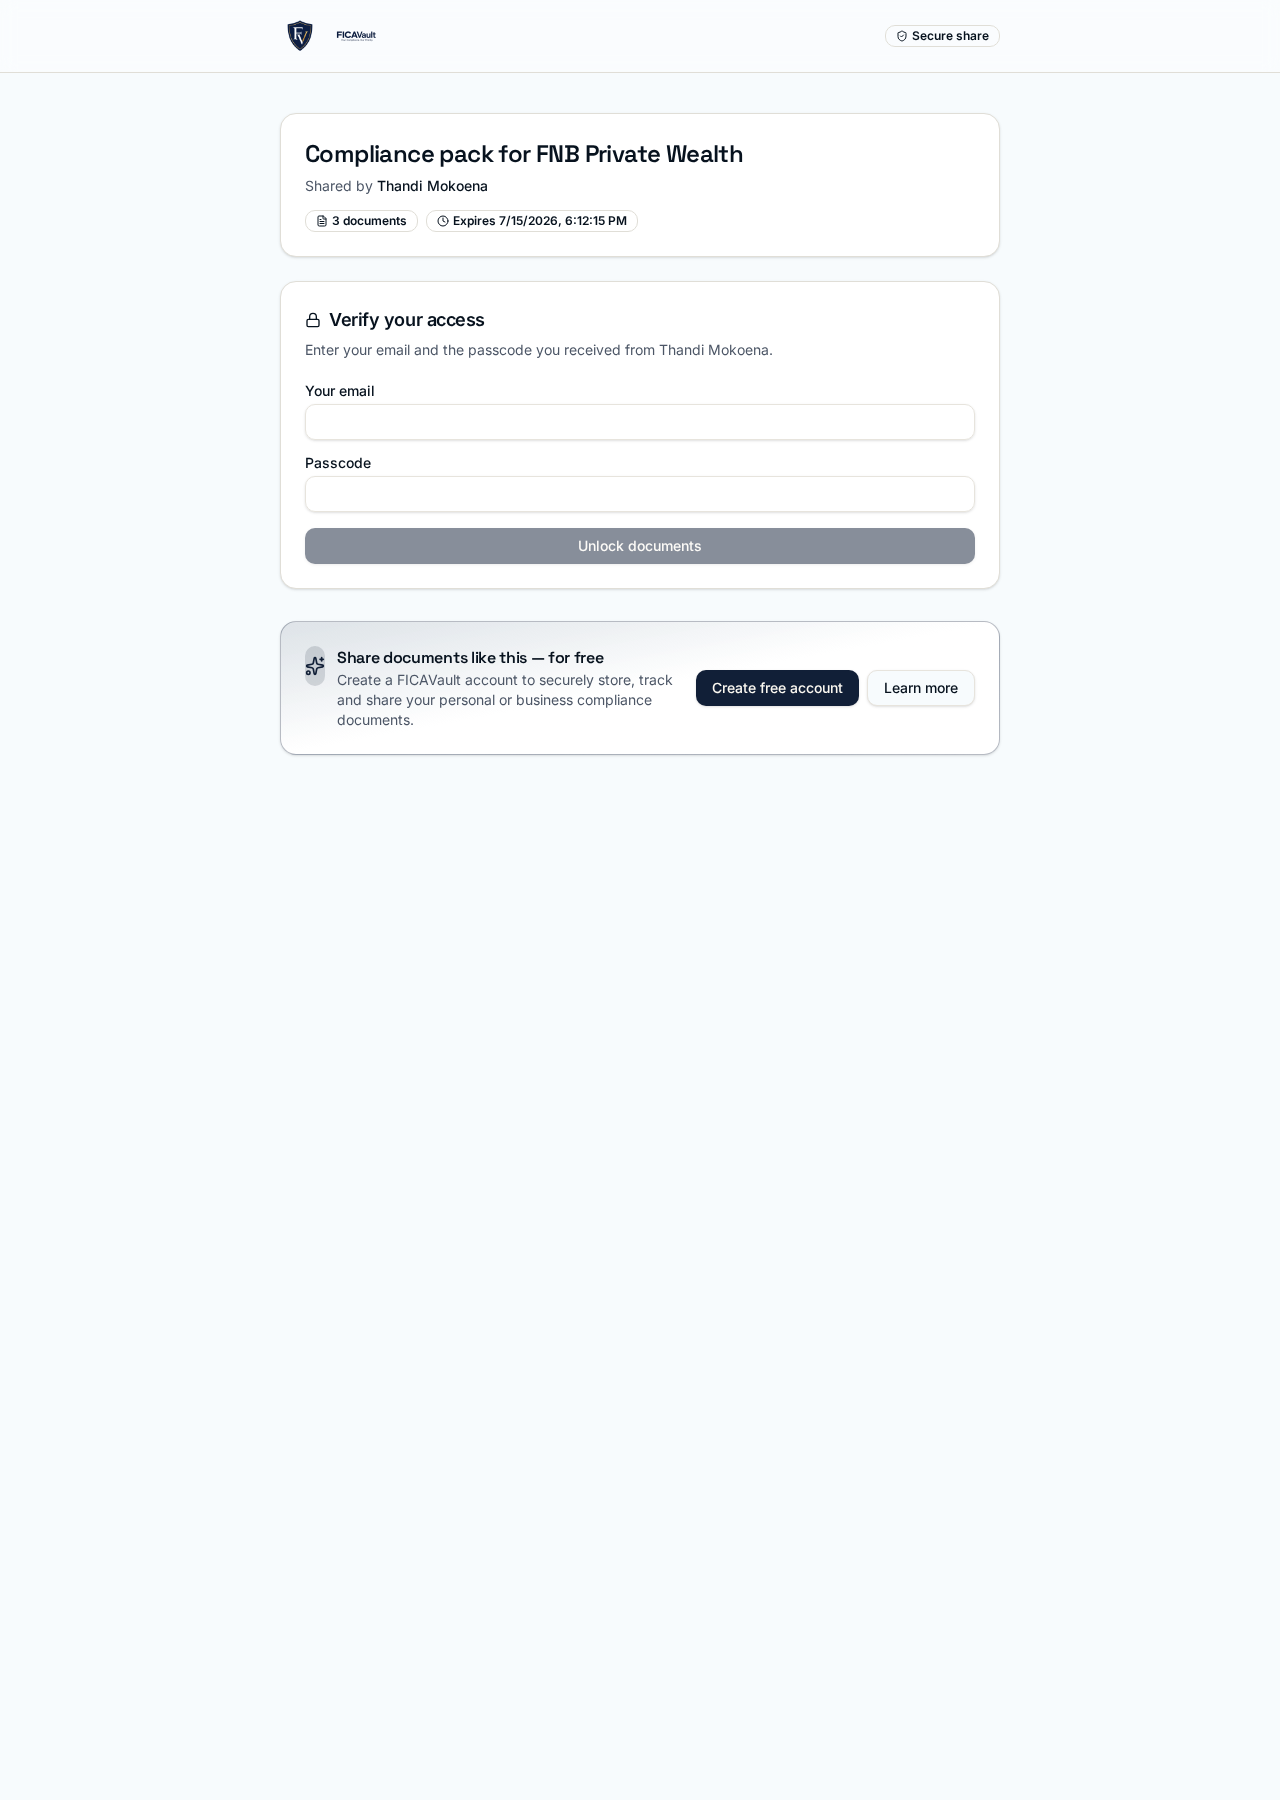
A share link is the fastest way to give a bank, advisor or attorney access to a specific set of documents. Each link is passcode-protected, tied to a single recipient email, has an expiry and (optionally) a download cap. You can revoke it at any time and see every access in the activity log.
Open the Share panel
Go to Dashboard → Share (or, from the vault, tap Create share link). Pick which entity you're sharing (yourself, or a business/trust).
Describe the share
Add an internal label (e.g. FNB — onboarding pack), and the recipient's email. The recipient must enter this same email plus the passcode to open the link.
Set expiry, download cap and passcode
Pick 1 hour, 24 hours, 7 days or 30 days. Optionally cap the number of downloads. The passcode is hashed on our side; if you lose it, revoke the link and create a new one.
Pick the documents
Tick only the documents the institution needs. Documents are grouped by category (ID, proof of address, bank, Signed FicMe Declaration, etc.).
Share it your way
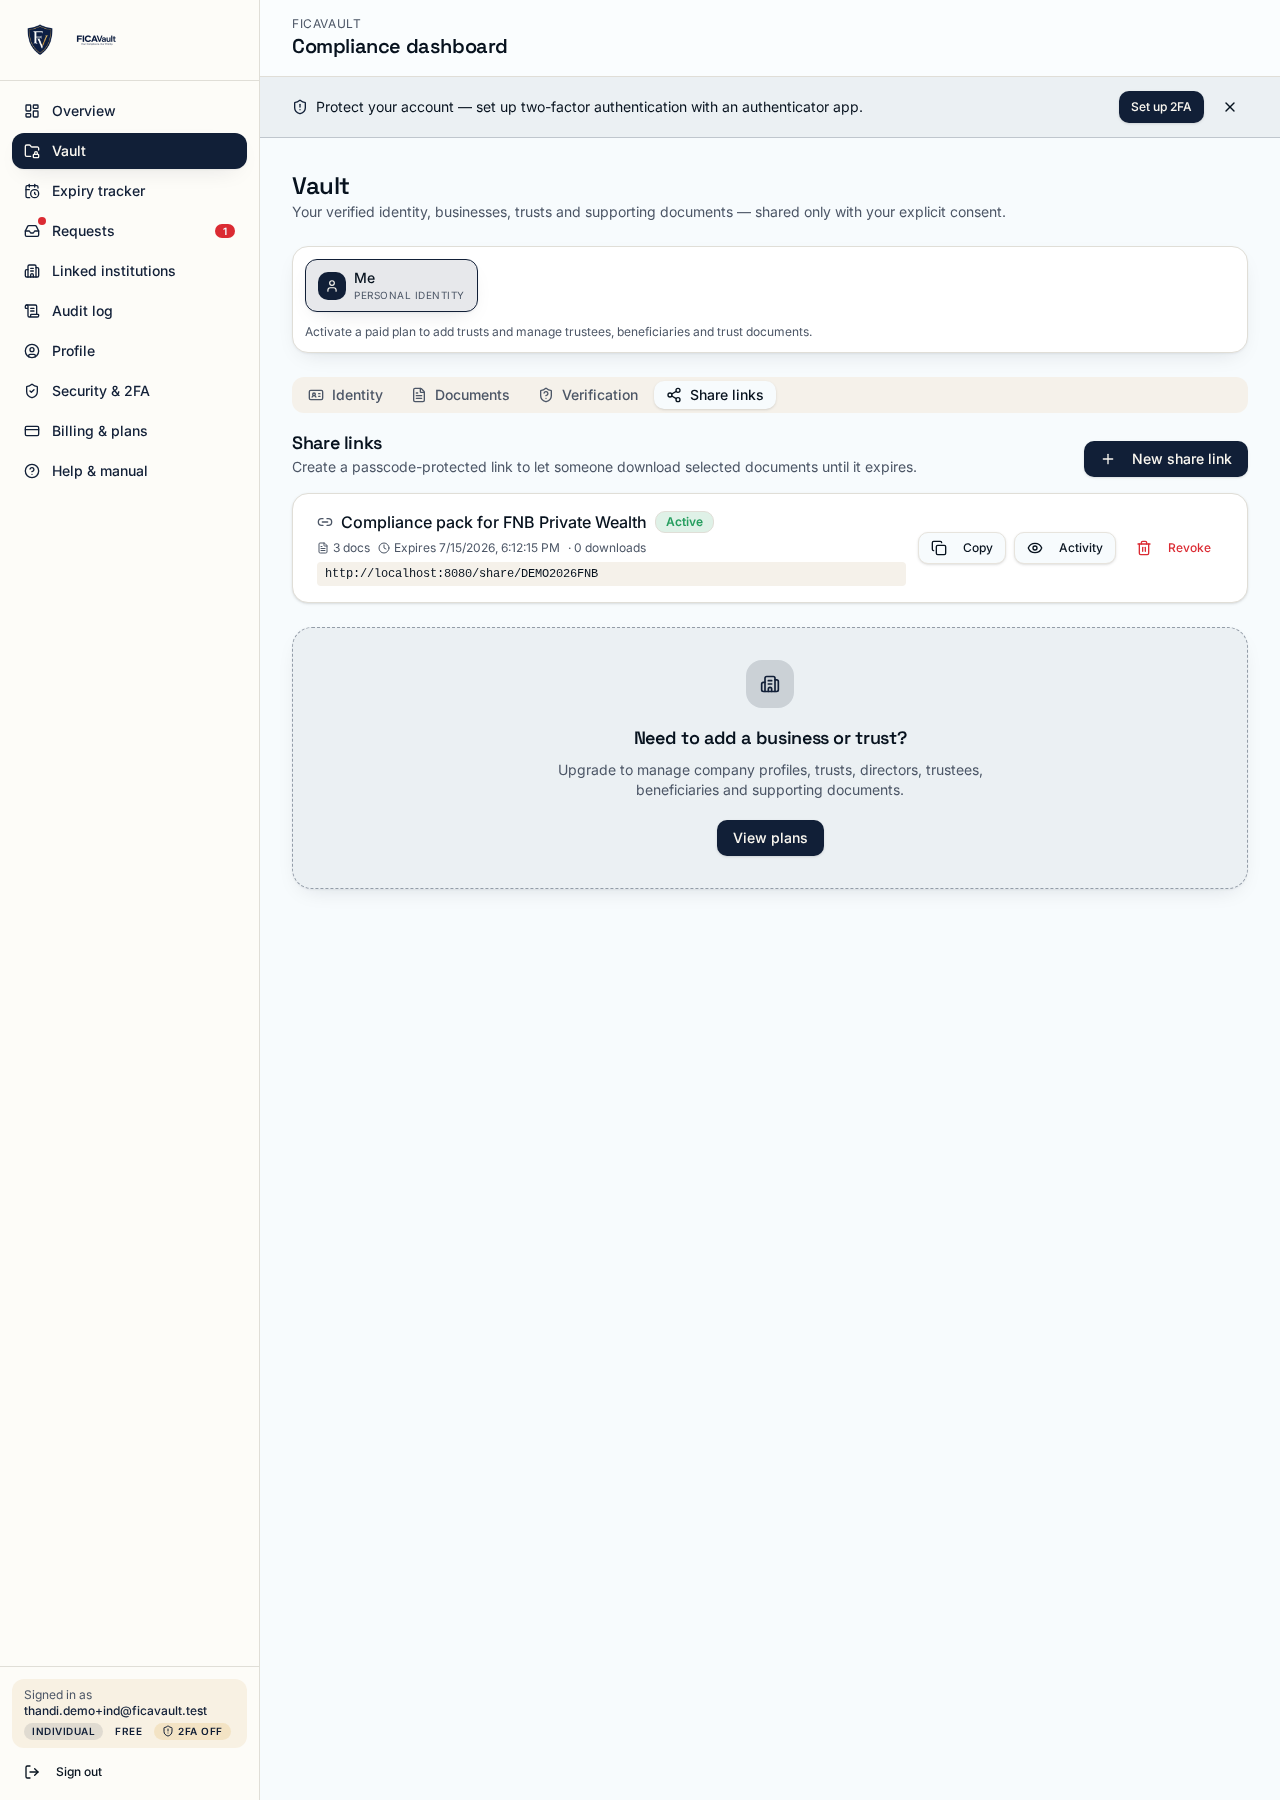
After creating, you land on a ready-to-share screen with the link, the passcode, and one-tap actions: Copy link, Copy passcode, Send via WhatsApp, Send via Email, and (on mobile) an Open native share sheet button that hands off to AirDrop, Messages, Gmail, Outlook or any other installed app.
Monitor and revoke
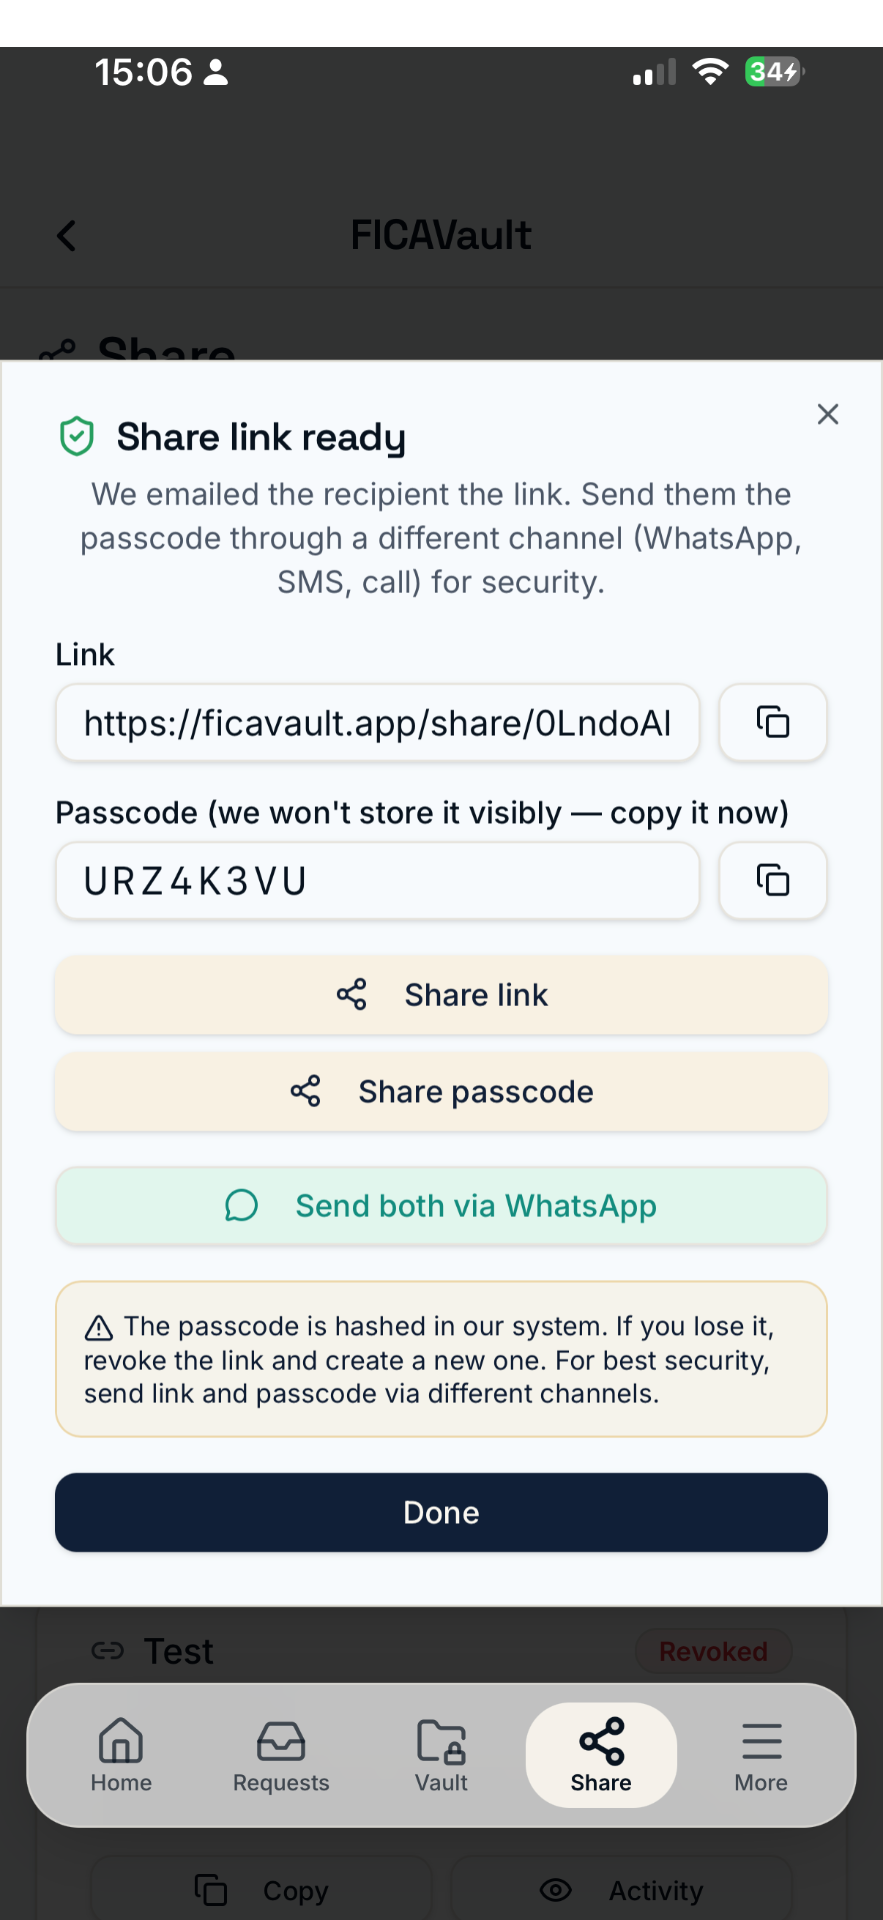
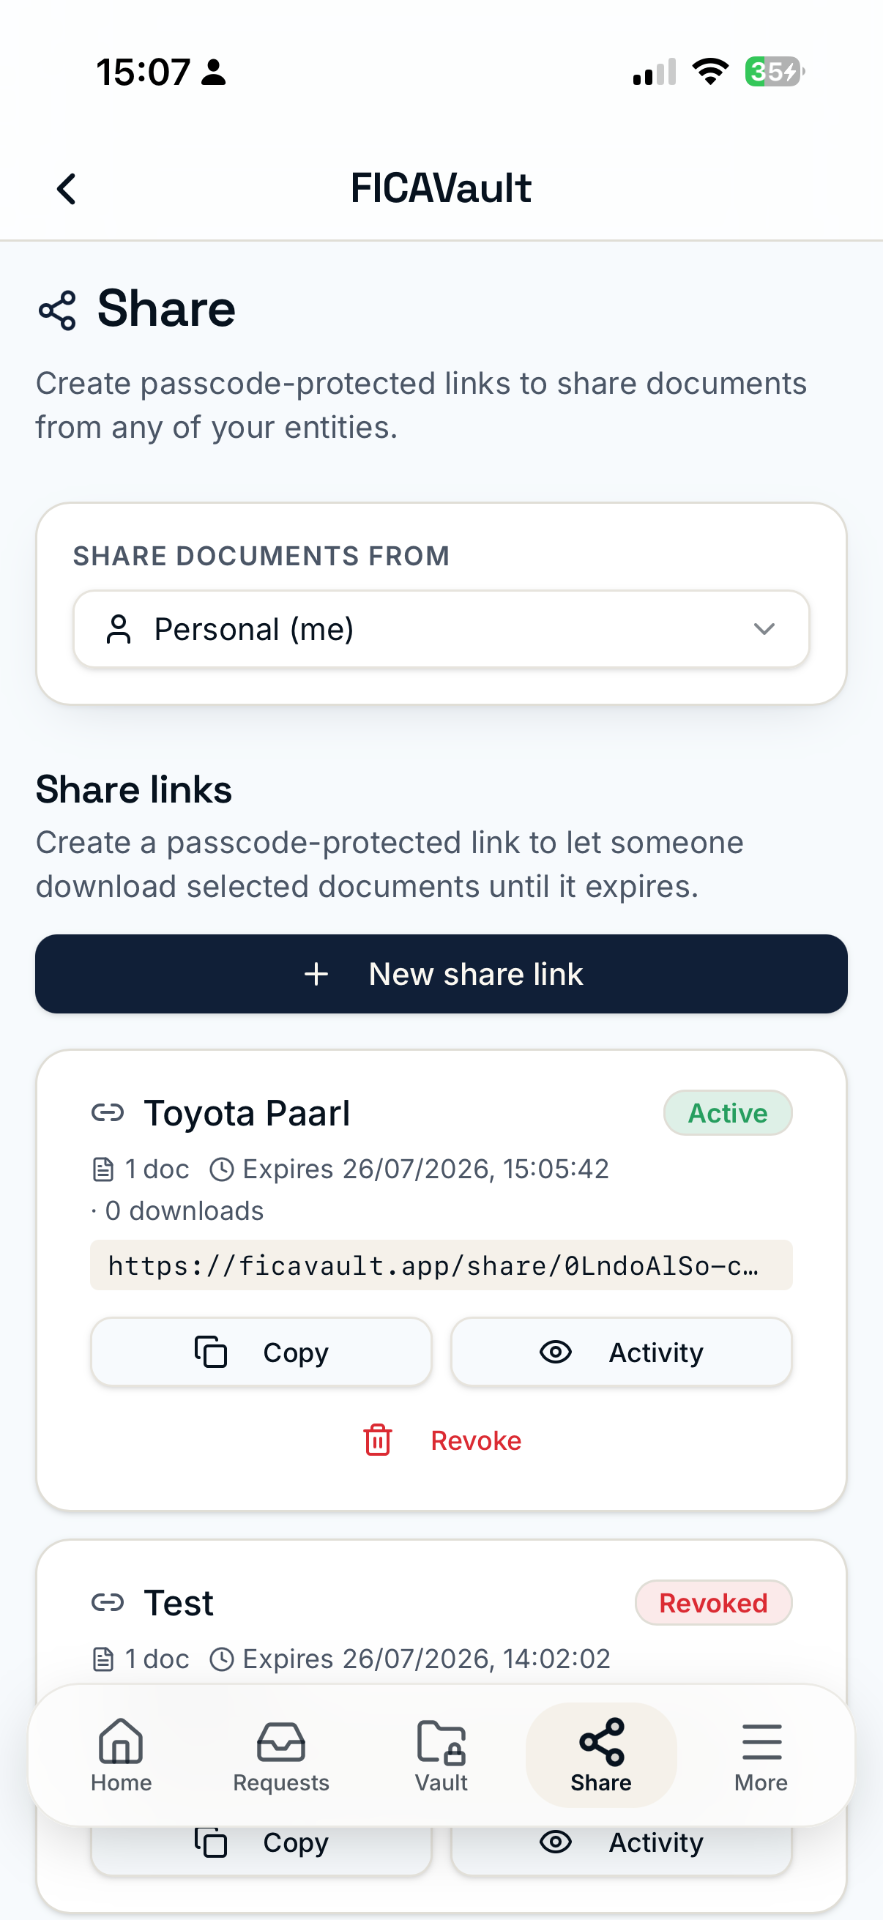
Click Activity on any link to see every event — link opened, passcode challenged, documents downloaded, with timestamps. If anything looks wrong, click Revoke and the link stops working immediately.
19. The Share page
The Share page is your central hub for outgoing sharing.
On the web
Dashboard → Share
In the mobile app
Tabs → Share
- Active links for every entity, with expiry and download counters.
- Create new link — jumps into the flow described in section 18.
- Recent activity — every open and download across all links.
- Revoke instantly kills any link.
20. Notifications page
The Notifications page replaces the old expiry list with a real-time, filterable feed of everything happening across your account.
On the web
Dashboard → Notifications
In the mobile app
Tabs → More → Notifications
What you'll see:
- Incoming document requests.
- OTP challenges and approvals.
- Share link opened / downloaded / expiring.
- Documents expiring in 30, 14, 7 or 1 days — with a one-tap Replace document action.
- Team-member sign-ins from a new device (Business / Institution).
- Successful welcome, day-1 feature tour and other lifecycle messages.
Every notification is also sent by email (and, on Pro, by SMS or mobile push). Fine-tune what you receive under Dashboard → Security → Notifications, or unsubscribe from a specific email using the link in its footer.
20b. Emailing documents into your vault
Every account gets a unique email address on in.ficme.app. Send or forward any document to that address and FicMe automatically stores it in your vault under the right category.
On the web
Dashboard → Email inbox
In the mobile app
Tabs → More → Email inbox
How to use it:
- Open the Email inbox page and tap Copy next to your address.
- Send a test email with any PDF or photo attached. Emails from your registered account address are trusted by default and filed straight away.
- Open the vault — the document is there with a category detected by our AI. Change it if it's off.
Trusted senders: add any address you want auto-filed — for example your bank statement address or a municipality account like accounts@citypower.co.za. Anything from an unknown sender waits under Needs approval until you tap Trust sender & file or File once.
Municipality auto-forward (pro tip): log in to your municipality account (City of Cape Town, City of Joburg, eThekwini, Tshwane, etc.), open your profile / notification preferences, and add your FicMe inbox address as a forwarding address for statements. Add the municipality's send-from address as a trusted sender and every new bill files itself as fresh Proof of Address.
Same trick works for: your bank e-statements, medical aid tax certificates, SARS auto-notifications, insurance renewals, retirement fund statements — anything that lands in your normal inbox on a schedule.
What we filter out: tracking pixels, tiny signature images, calendar invites and files bigger than 25 MB.
Privacy: the email itself is never opened by a human. Attachments are stored in your private vault with the same row-level security as any other document, and only you (and institutions you approve) can see them.
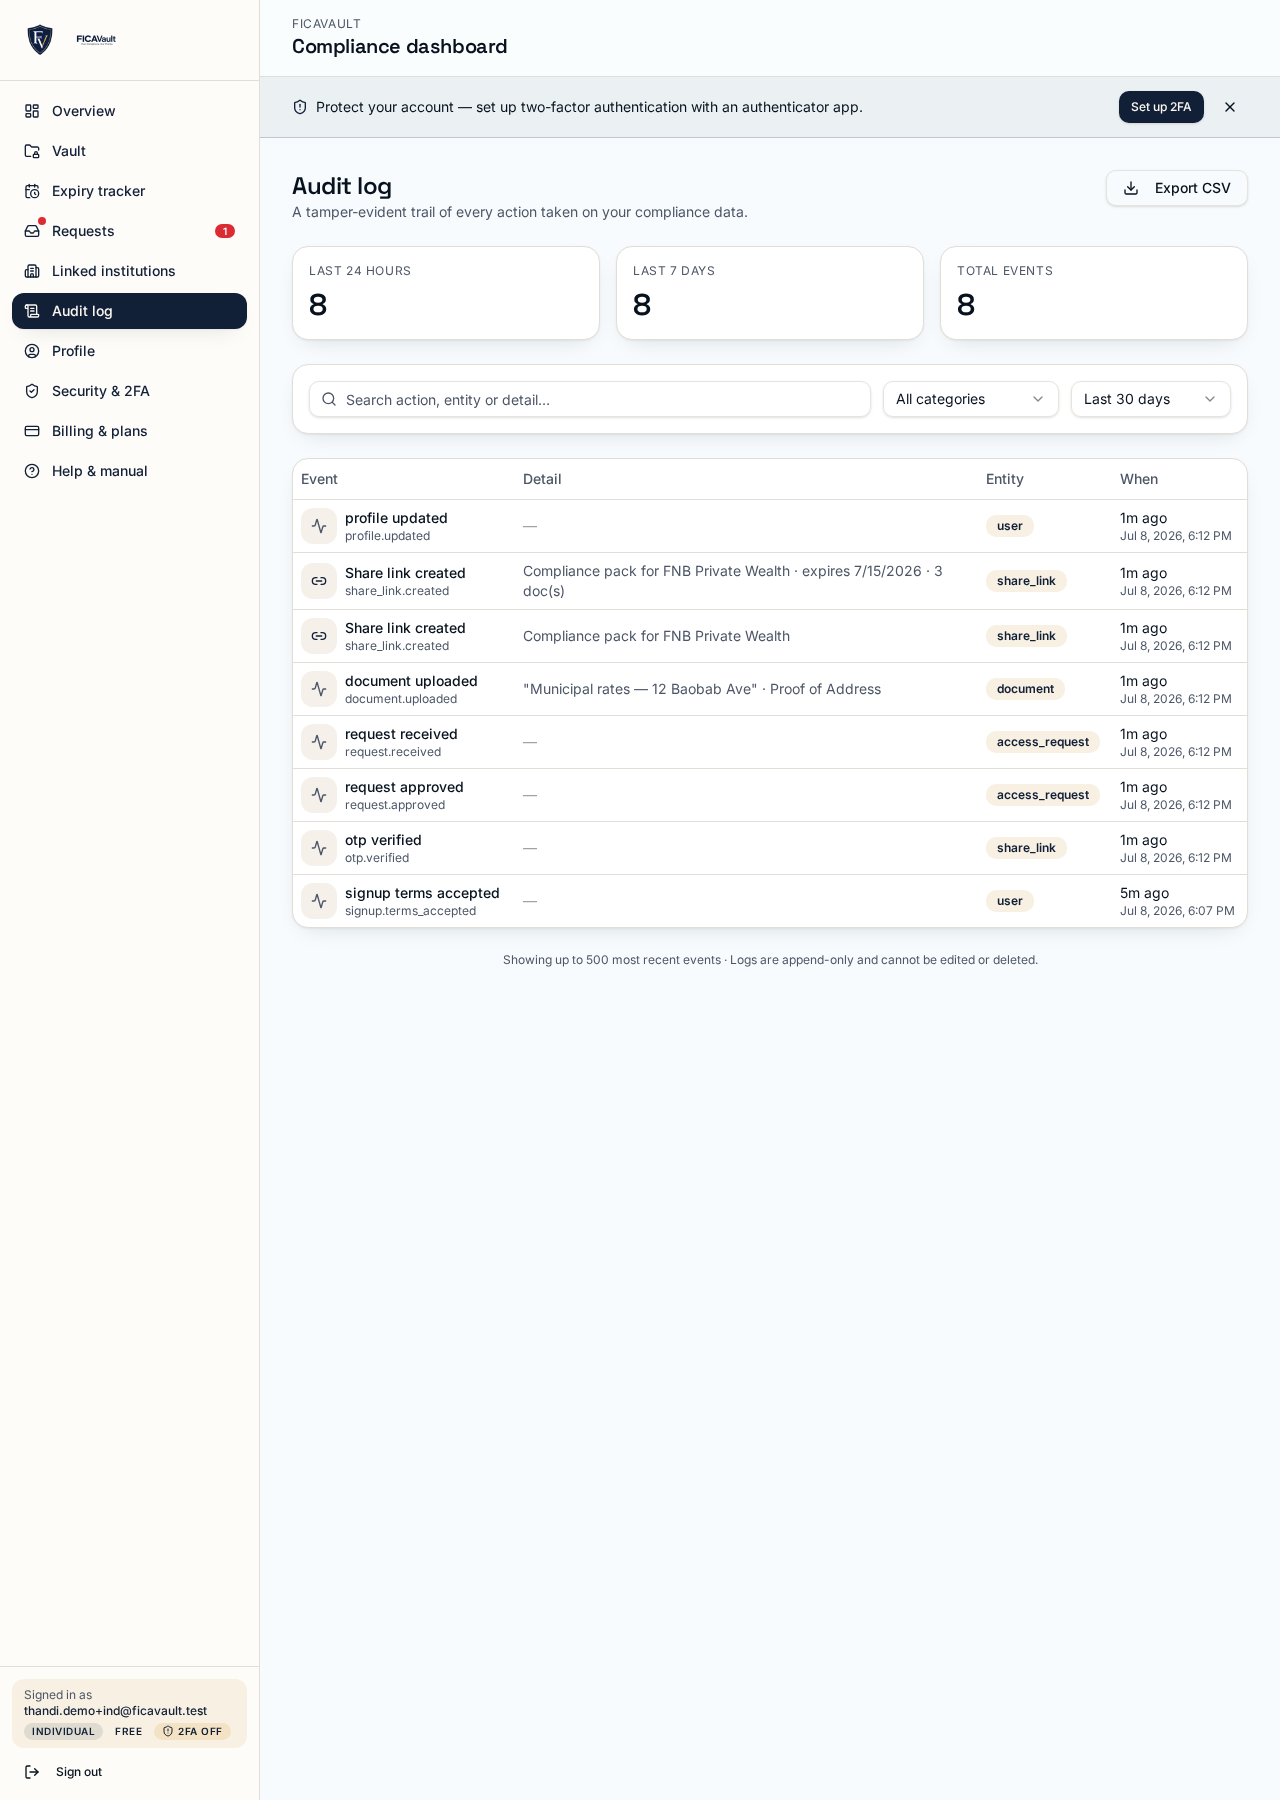
21. The audit trail
Every meaningful action in FicMe is written to an append-only audit log. Nothing can be deleted or edited retroactively.
What is logged:
- Account events — signup, login, password change, email change, 2FA enrol.
- Vault events — upload, replace, archive, expiry roll-over.
- Request events — created, viewed by client, OTP challenged, approved, denied, expired, revoked.
- Access events — file previewed or downloaded, and by which team member.
- Share-link events — link generated, opened, passcode challenged, revoked.
- Admin events — role changes, entity added/removed, billing changes.
- Identity events — verification succeeded, mismatch detected.
What is captured per event: who, what, when (UTC), source IP, user-agent and a stable event ID.
Individuals see their own log under Dashboard → Audit. Institutions can filter by client, team member or date and export the log as a compliance pack (CSV + PDF).
22. Data protection, POPIA & downloading your data
- Encryption in transit and at rest. All documents travel over TLS and are stored encrypted.
- Least-privilege access. Row-level security means one user cannot query another user's data — checked on every request at the database.
- Consent-first sharing. Institutions cannot access your documents until you approve with OTP or a share link.
- Auditable disclosures. Every access leaves a permanent record you can inspect.
- Automatic retention sweeps. Expired share links, used OTPs and old audit lines are purged on a nightly schedule.
- Breach notification. If a breach affects your data we notify you and the Information Regulator per POPIA s.22.
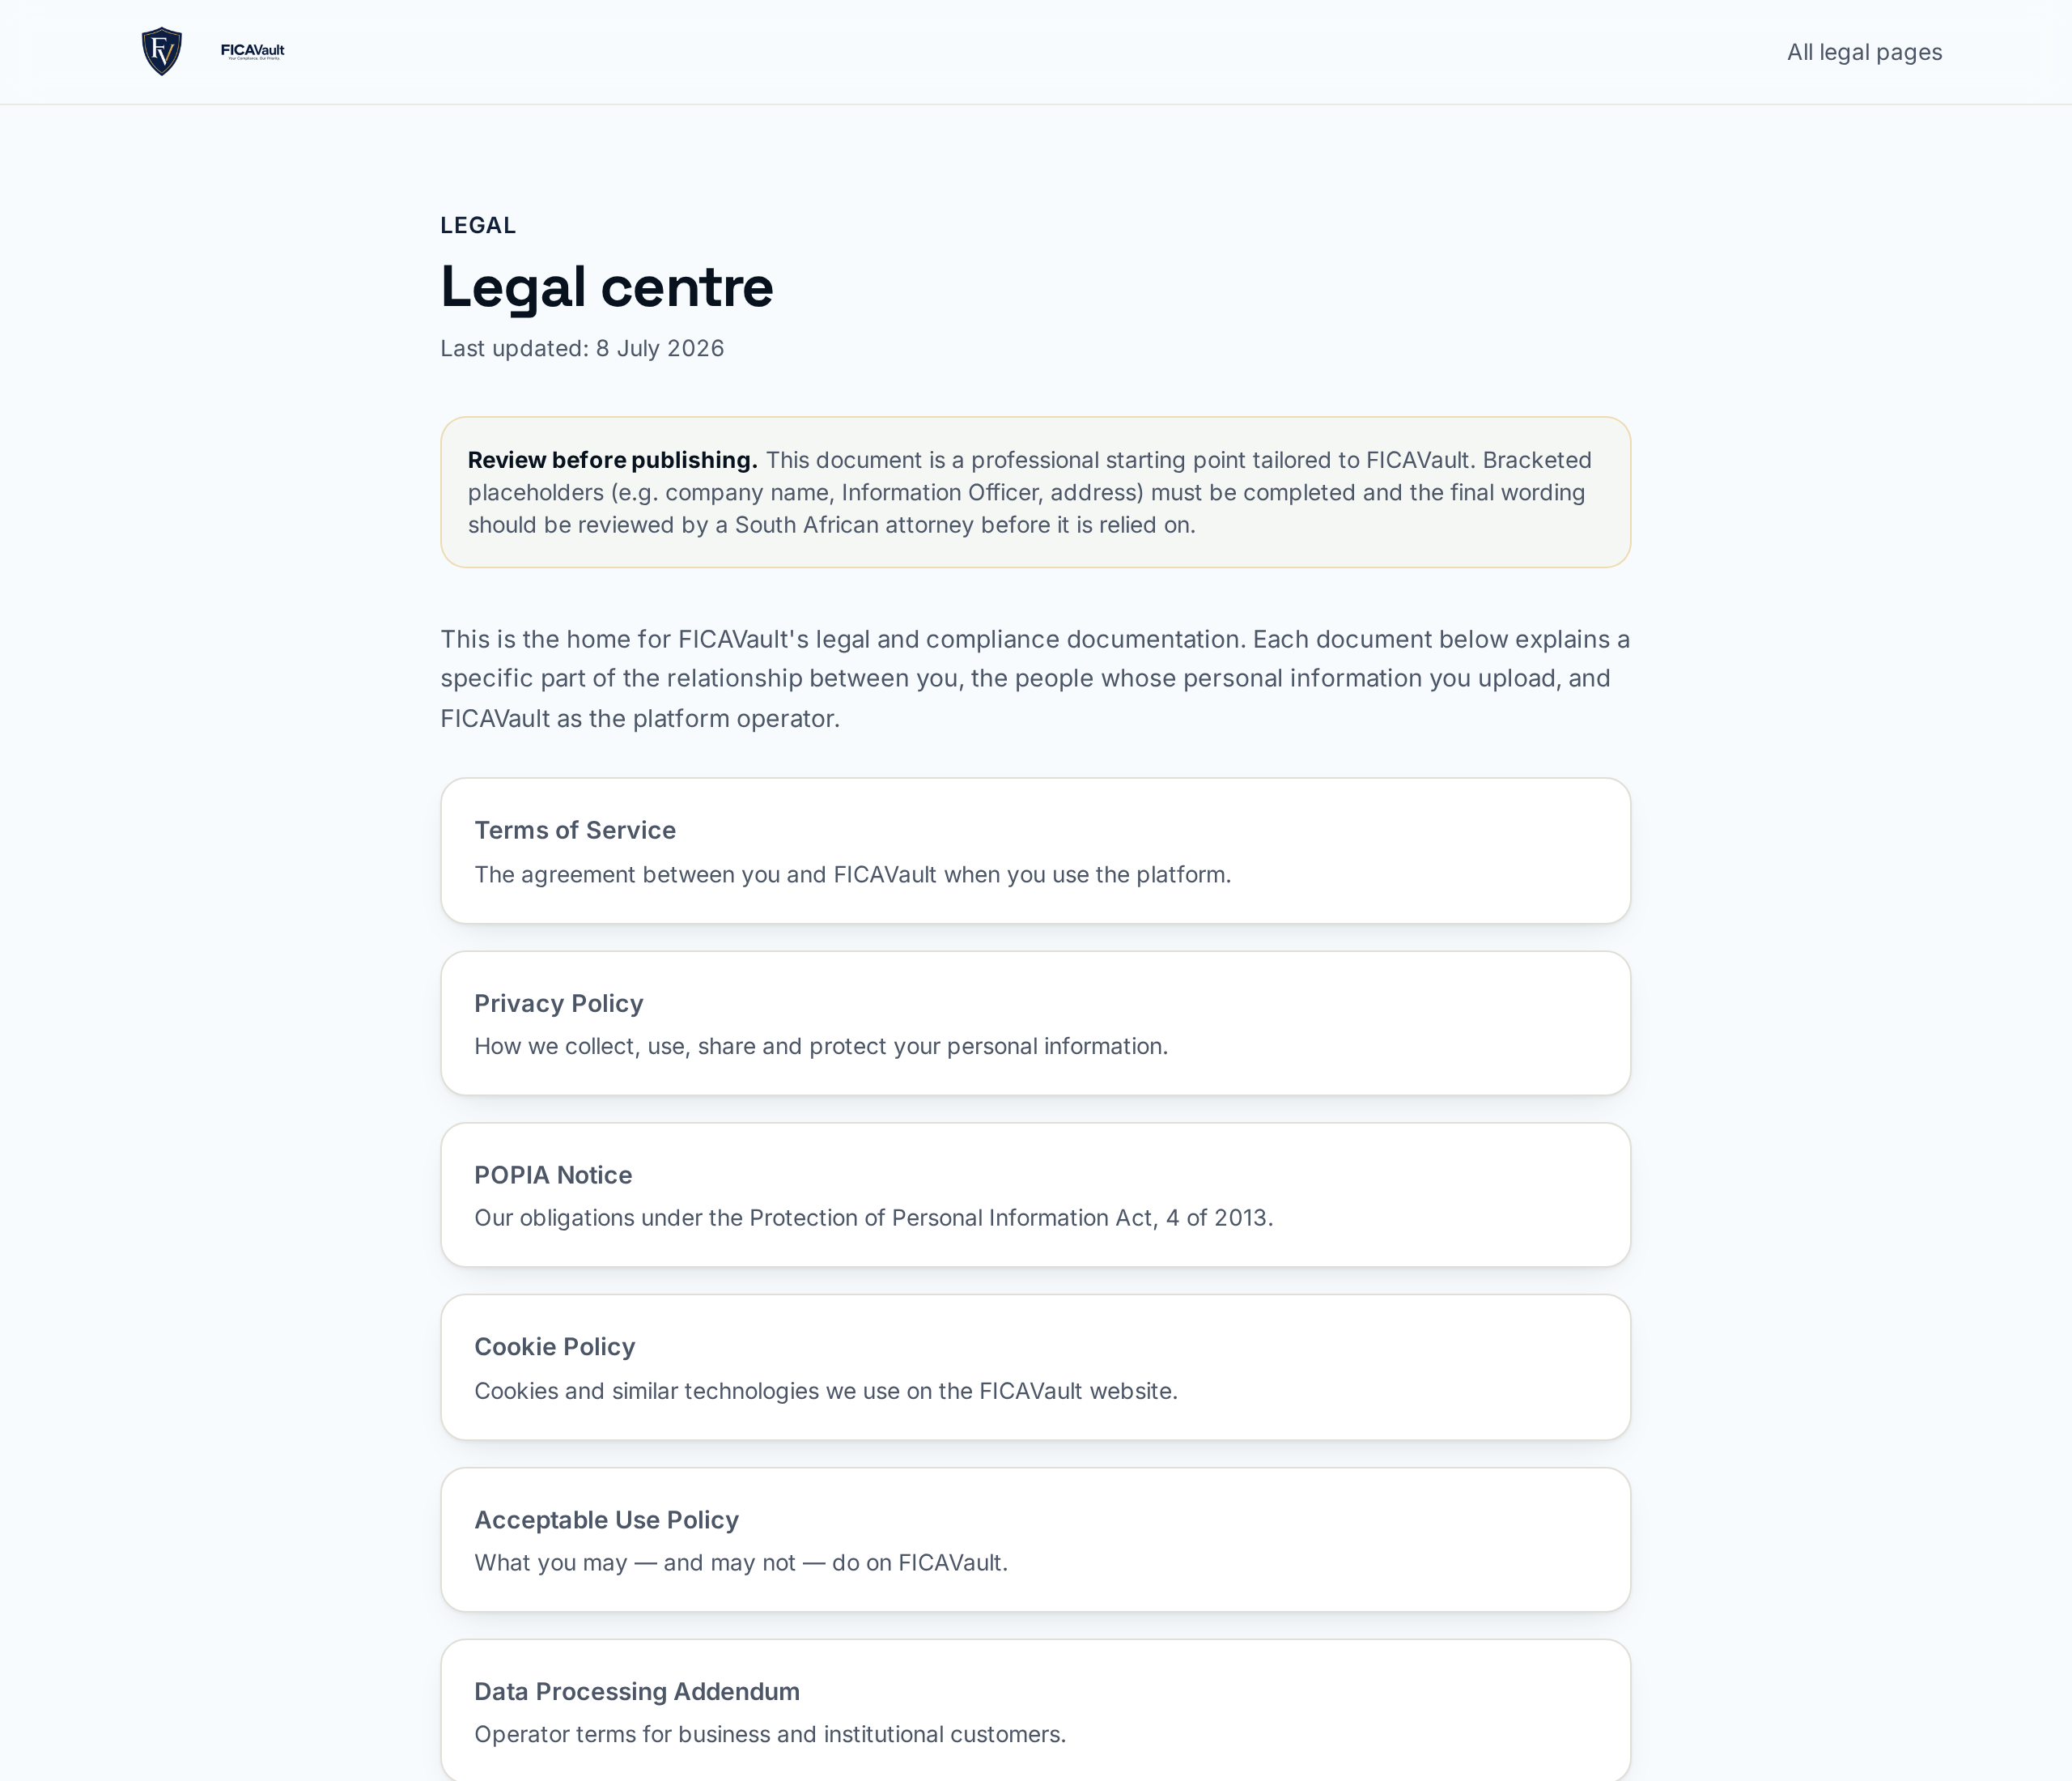
- POPIA-aligned. Read our POPIA Notice and Privacy Policy.
Downloading your data (DSAR)
Under POPIA you have the right to a copy of your personal data. Go to Dashboard → Profile → Download my data (JSON). You'll receive a machine-readable JSON export of your profile, vault metadata, requests, share links and audit trail. Raw document files are available under the vault's Download action.
23. Two-factor authentication (2FA)
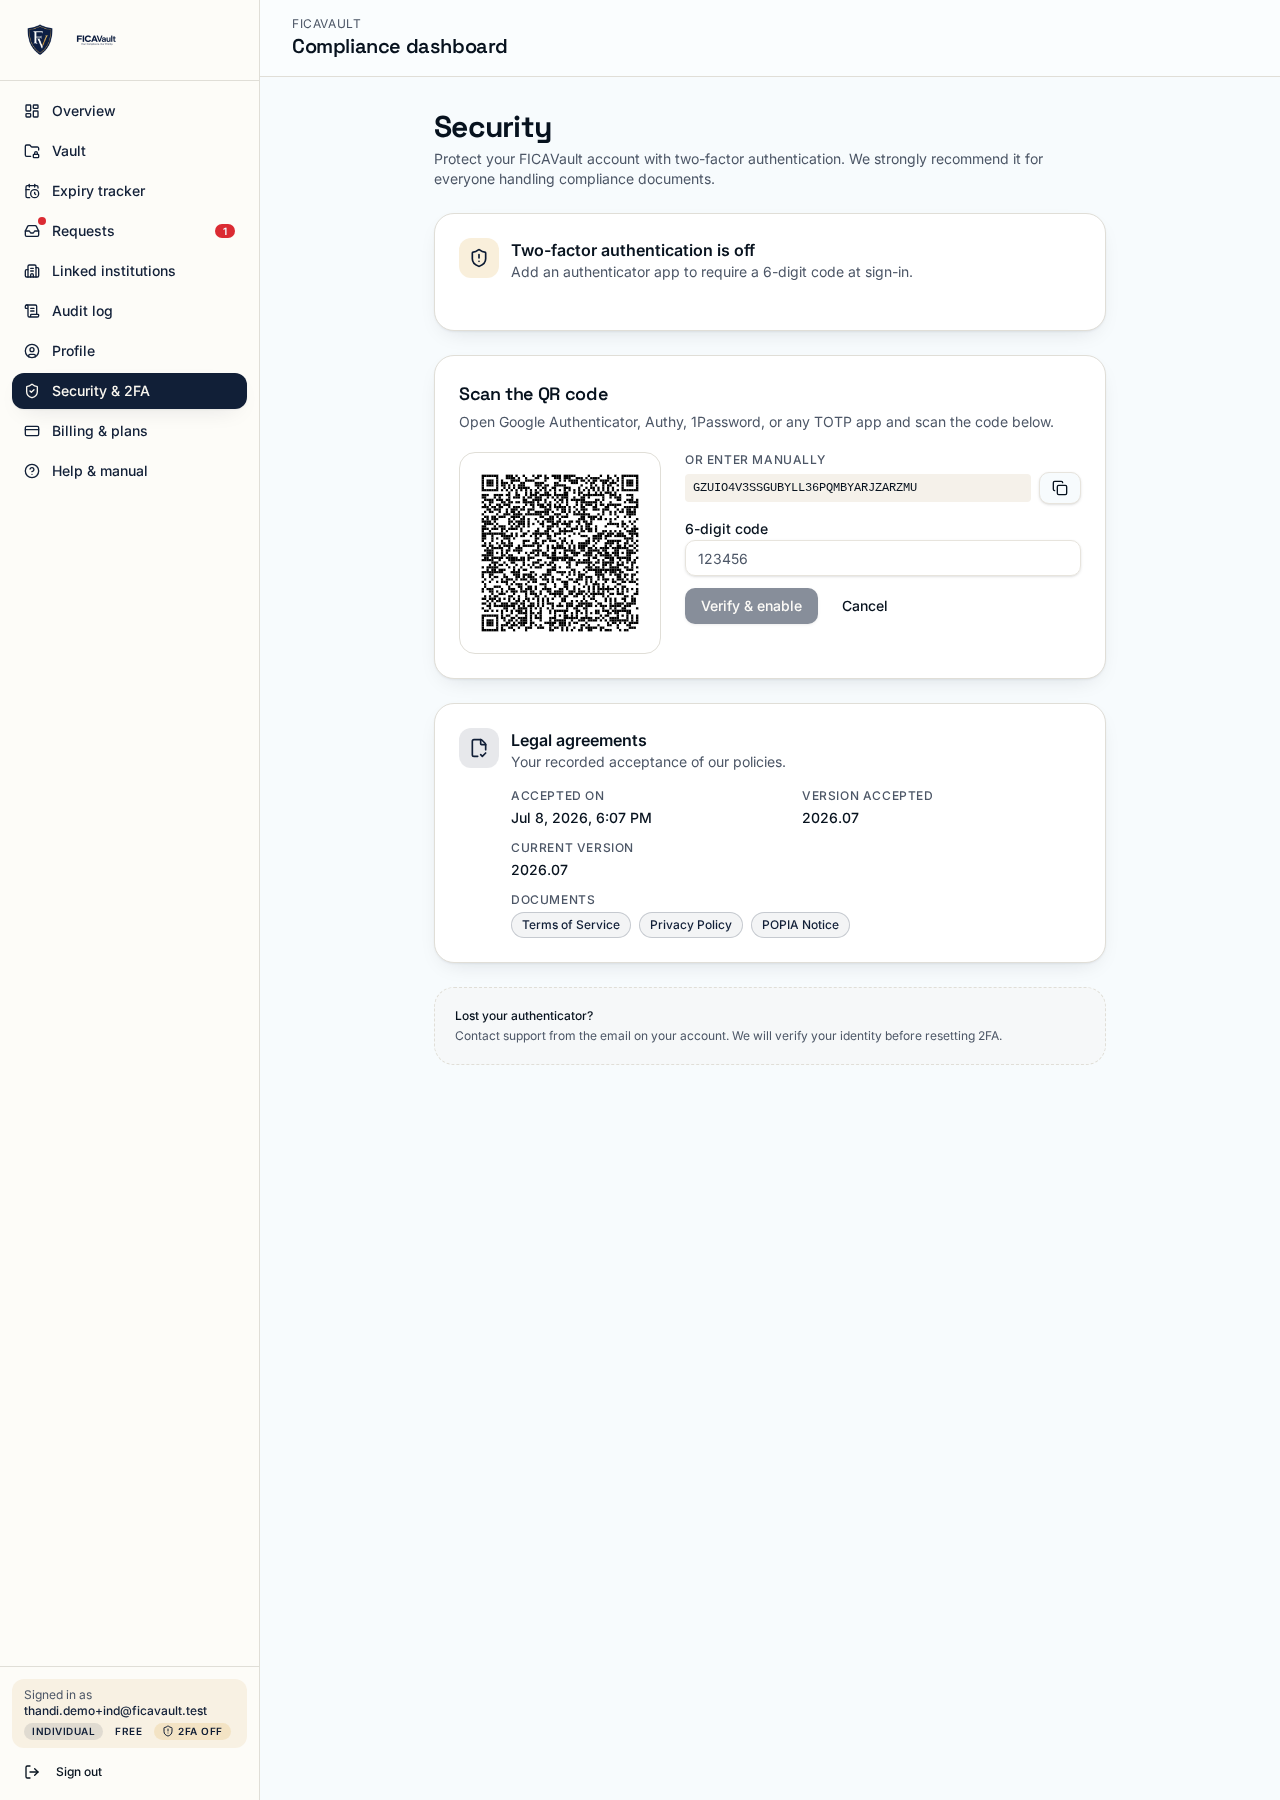
Because your vault holds identity documents, we strongly recommendturning on two-factor authentication. With 2FA on, signing in requires both your password and a six-digit code from an authenticator app (Google Authenticator, 1Password, Authy, Microsoft Authenticator, etc.). A leaked password alone can't open your account.
Open Security & 2FA
Sign in and click Security & 2FA in the sidebar (mobile: More → Security).
Add an authenticator
Click Add authenticator. A QR code and text secret appear — scan the QR with your app.
Confirm the six-digit code
Type the current code back into FicMe. 2FA is now active.
24. Profile & account settings
The Profile page is organised into three tabs on both web and mobile.
On the web
Dashboard → Profile
In the mobile app
More → Profile
- Account — your sign-in email, member-since date, legal acknowledgements, how to request a copy of your data, and account deletion.
- Security & 2FA — change your password, manage two-factor authentication and (on mobile) biometric unlock.
- Audit log — your full activity history with search, filters and CSV export.
- Download my data — email security@ficme.app; we verify your identity and provide your export under POPIA section 23.
- Delete account — type DELETE to confirm. This erases your profile, documents, share links and memberships and signs you out everywhere. Institutions that already received approved documents keep their copies for their own FICA records.
25. iOS & Android apps
FicMe ships as native iOS and Android apps (built on Capacitor over the same web app, so features stay in sync). Download from the App Store or Google Play using the buttons on the landing page.
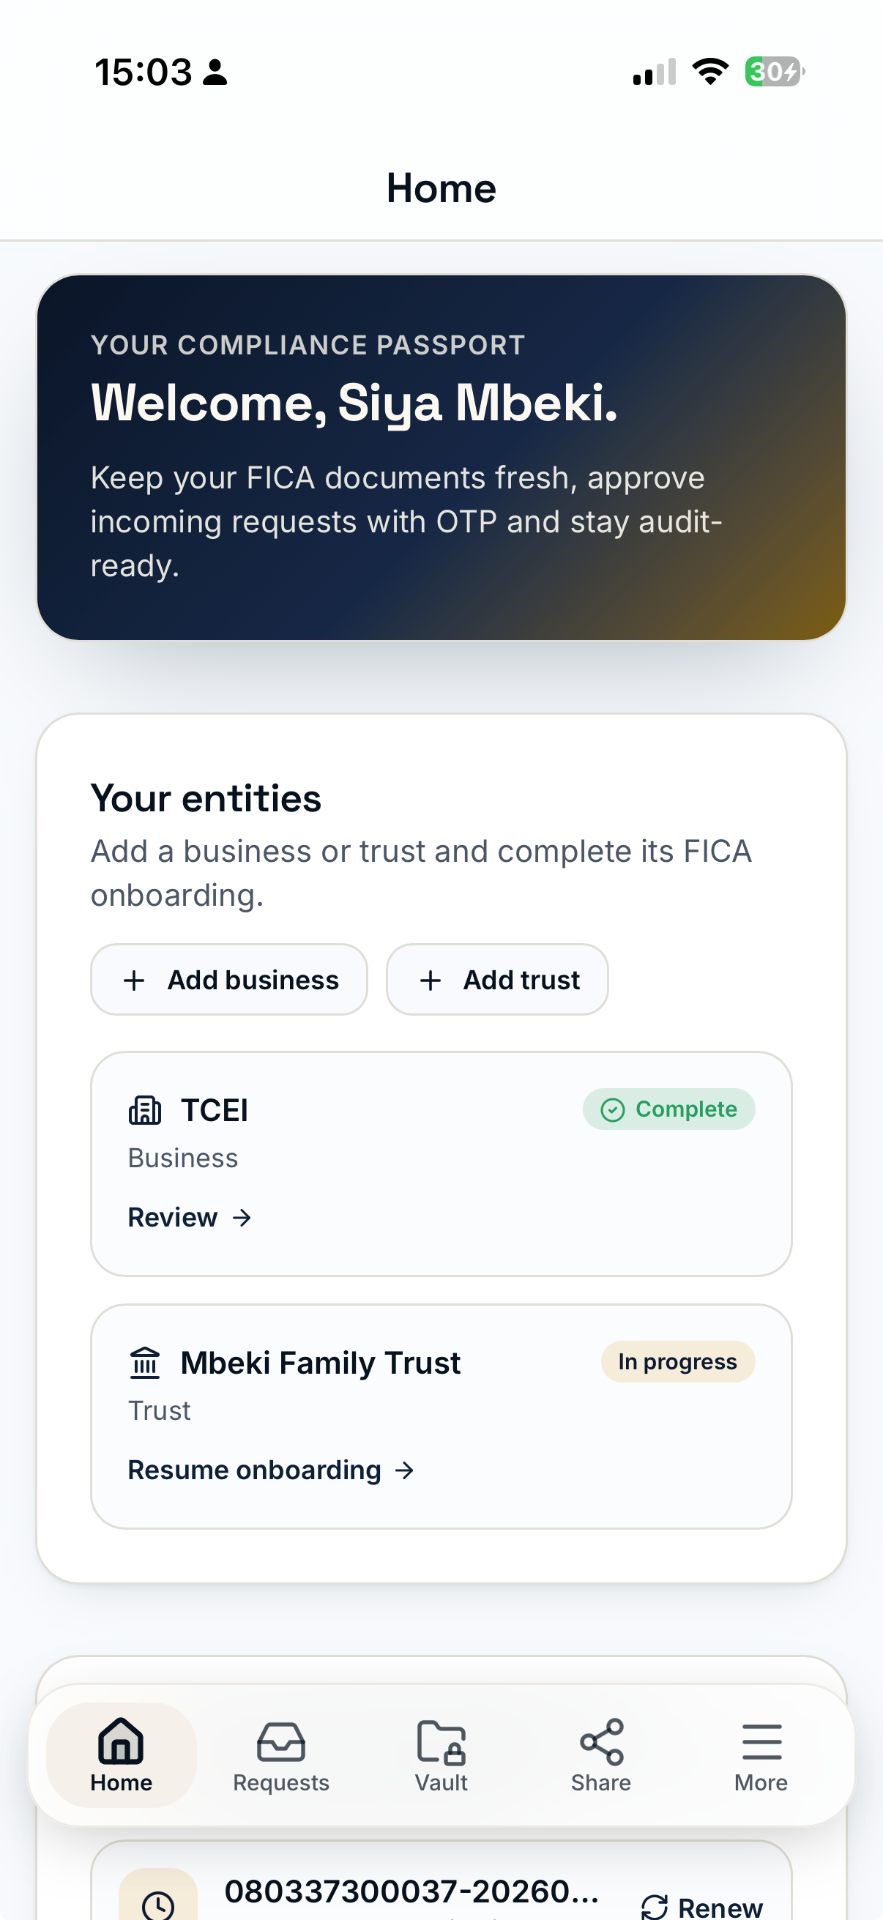
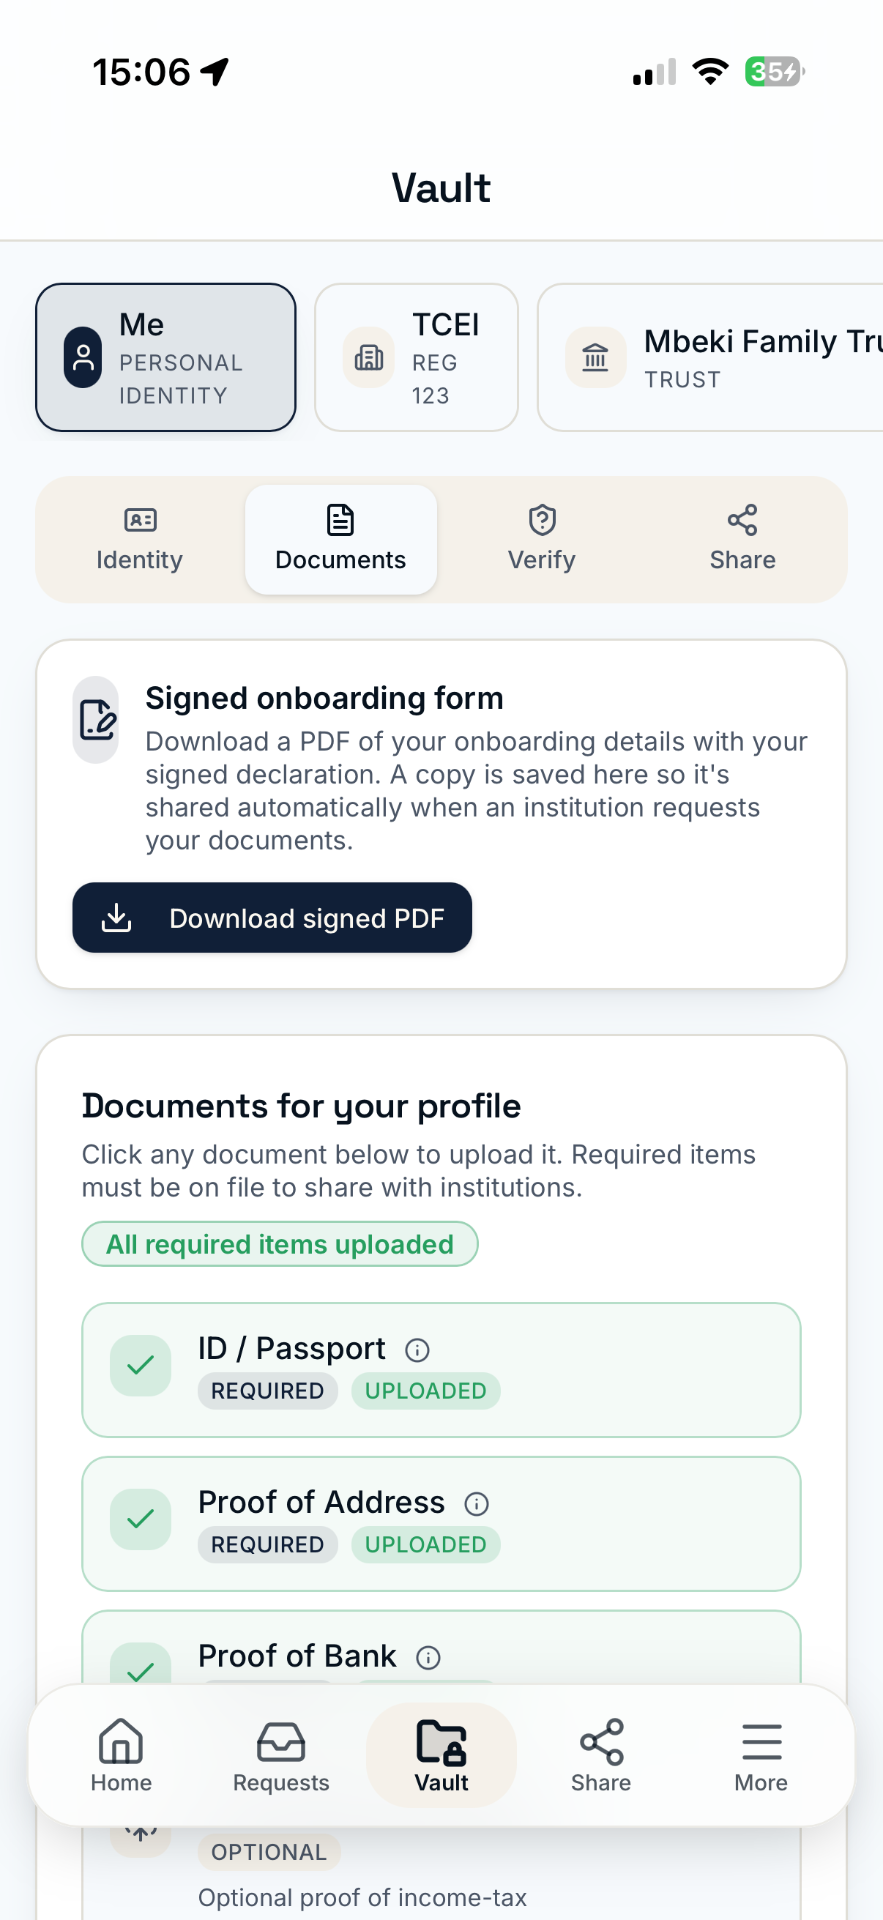
Navigation:
- Bottom tab bar — Home, Vault, Requests, Share, More.
- More — Notifications, Organisation, Profile, Security, Billing, Help.
- Tapping the tab you're already on closes any open overlay (including the More sheet).
- Toasts appear at the bottom-centre on mobile so they don't hide the status bar.
26. Face ID / Fingerprint login
The mobile apps support Face ID (iOS), Touch ID (older iOS) and Fingerprint (Android) so you can reopen your vault without typing your password every time.
Log in once with your password
Open the app and sign in normally.
Enable biometric unlock
Go to More → Security → Biometric unlock and tap Enable. iOS / Android will prompt for permission — approve it.
Next launches: just look / tap
When you reopen the app, tap Unlock with Face ID / Fingerprint. If it fails 3 times or you tap Use password, you fall back to the login form.
27. Camera capture (mobile)
Anywhere you can upload a document (onboarding, vault, autofill, verification), the mobile app shows a Take photo button next to the file picker.
- Uses the native camera at full resolution for a crisp OCR pass.
- Preview and retake before uploading — nothing saves until you confirm.
- First use asks for Camera and Photo Library permission — approve both so you can choose between camera and photo library.
- Denied by accident? Fix under iOS Settings → FicMe → Camera / Photos or Android Settings → Apps → FicMe → Permissions.
29. Security best practice
- Use a unique, long password (13+ characters). Consider a password manager.
- Turn on 2FA (section 23) and, on mobile, biometric unlock (section 26).
- Keep the mobile number linked to your account current — OTPs go there.
- Review your audit log at least monthly and after any surprising email.
- Revoke share links you're no longer using.
- Institutions: remove leavers from your team the same day, and rotate admin roles regularly.
- Never send a share link and its passcode in the same message.
30. Billing & upgrades
Every account is free to create and explore. You are only charged when you actively use paid capacity:
- Individual → Pro — notifications, audit export, AI autofill (R 49 / month).
- Individual → Business — from Billing, tap Upgrade to Business. Your personal vault is preserved and you can immediately add company / trust entities.
- Business — R 199 / month for up to 2 entities; +R 49 per extra entity.
- Institution — R 3 999 / month for 25 linked clients; +R 250 per extra block of 25.
No VAT is added — the amount shown is the amount charged. The pricing page and Dashboard → Billing & plans always show the current, authoritative price. Downgrade or cancel at any time; access remains until the paid period ends.
31. Workspaces & switching between profiles
If your account belongs to more than one profile — your personal passport plus a business, trust or organisation — FicMe keeps them separate as workspaces.
On the web
Top bar → workspace switcher
In the mobile app
More → workspace switcher at the top
- The vault, requests, compliance status and audit entries you see always belong to the active workspace.
- Switching workspaces never mixes documents between profiles.
- Your menu changes with the workspace: an organisation workspace shows Organisation, Request documents and Saved clients.
32. Managing a business or trust on behalf of a client
Currently switched off. Institutions no longer add or manage businesses and trusts on a client's behalf — owners keep their entities themselves and share documents through requests and share links. FicMe can switch this capability back on for the whole site if it is ever needed; the rest of this section describes how it works when it is on.
Send the request
Under Request documents, select the business or trust and choose the purpose manage on their behalf. This purpose is only available for business and trust entities.
The owner approves
The owner reviews the request under Requests and approves it with OTP consent, exactly like a document request.
Both sides can work
The institution can now edit the entity profile and upload documents. The owner keeps full access — nobody is locked out.
33. Compliance readiness & required documents
The Compliance page scores your profile against the rules for your entity type and tells you exactly what is still outstanding.
- Required — blocks completion until supplied.
- Optional — suggested, never blocking.
- Available — relevant to your entity type but not requested.
- Rules are conditional: Proof of bank becomes required only once bank details are captured, and anything marked N/A never asks for a document.
- Each outstanding item links straight to the step or upload that fixes it.
Compliance packs and the Signed FicMe Declaration regenerate automatically when your data changes, so what you share is always the latest version.
34. Minors & guardian consent
When a captured ID number shows the person is under 18 — typically a trust beneficiary — FicMe flags it immediately.
- A red minor notice appears directly below the ID number.
- Occupation and other adult-only fields are not asked for.
- A guardian consent request is emailed for signature; the profile is not complete until it is returned.
- The signed guardian declaration is stored with the entity's documents and appears in the audit log.
35. Correction requests
If captured details are wrong, they can be sent back for correction instead of being re-captured from scratch.
- The person sees the correction request on their dashboard with the exact fields flagged.
- The onboarding wizard reopens and lets you move freely between steps to fix them.
- Once corrected, the details are re-submitted for approval and the change is logged.
36. Retention periods (access windows)
When you approve a request, you decide how long the institution keeps access to the approved documents.
- Pick a retention period from 30 up to 365 days — you can override the suggested default at approval time.
- When the period lapses, the institution's access ends automatically.
- You can revoke access earlier at any time from Requests or Linked institutions.
- Documents an institution already downloaded during the window remain in their own records — that is a FICA record-keeping requirement on their side.
37. Payments, invoices & failed payments
Card payments are processed by Paystack. FicMe never stores your card number — only the brand and last four digits appear on your receipt.
- Billing profile — billing name and a searched billing address, passed to the payment provider with your payment.
- Checkout — shows the exact amount and what it covers (for example Additional entities (3)), then confirms the amount paid, the next billing date and the next amount.
- Invoices — downloadable PDFs, also emailed to you, each linked to its payment reference.
- Failed payment — a red banner appears and you have 48 hours to fix it. After that the account moves to the free plan; nothing is deleted, and paying again restores your plan and access straight away. Retry is only offered for the invoice actually blocking your subscription, and automatic retries stop after three attempts.
38. Institution approval & organisation team
Accountable institutions are reviewed by FicMe before they can request documents from clients.
- Complete the organisation onboarding, including the entity representative declaration (director, compliance officer or money laundering reporting official) and the required uploads such as the FIC Confirmation of Entity Registration — that step can't be passed until they are uploaded.
- You'll receive an approval email once FicMe has reviewed the profile.
- After approval the profile becomes read-only so the approved record can't change silently. Email support@ficme.app to update details.
- Team — under Organisation, invite colleagues by email and grant only the permissions they need. You can only grant permissions you hold yourself, and access can be changed or removed at any time.
39. Troubleshooting & FAQ
I never got the confirmation email.
Check spam / promotions. Try to sign in — the login page shows a Resend button when the email isn't yet verified. If still stuck after 15 minutes, email support@ficme.app.
The OTP isn't arriving on my phone.
Confirm your mobile number under Profile → Contact. Try the email OTP fallback. Some networks delay SMS — wait up to two minutes before requesting a resend.
My 6-digit 2FA code is being rejected.
Codes rotate every 30 seconds — make sure your phone's clock is set to automatic network time. Try the next code (wait for it to change) or contact support to reset the factor.
The identity badge stays orange (mismatch / no matching documents).
Upload a clearer photo of your SA ID or passport (front and back if applicable). Our AI re-checks within seconds. If it still fails, contact support with a clear photo of the same document.
I entered my ID during onboarding, backed out and now it says the ID is already registered.
This is now fixed — the wizard updates the existing row instead of creating a duplicate. If you still see it, hard-refresh the app (or force-quit the mobile app and reopen) and it should recognise you.
The recipient can't open my share link.
Check they're using the exact email you entered when creating the link, and the current passcode. If the link is expired, revoked or the download cap is reached, create a new one.
I want to change my email address.
Dashboard → Security → Change email. Confirmation link goes to the new address; a notification lands at the old one.
Can I approve just some of the documents an institution asked for?
Yes. Deselect items on the approval screen before entering the OTP. Only the ticked documents are unlocked.
Face ID isn't offered on the mobile app.
You must log in with your password once. Then go to More → Security → Biometric unlock → Enable. If the toggle is greyed out, your OS biometric isn't set up yet.
When I tap Share on mobile, only a link is shared, not the file.
Make sure you're on the latest build (v1.6+). Older builds shared only the URL — we now download the file to cache and share it as an attachment.
I can't add a business — the option is missing.
You're on the Individual plan. Go to Billing → Upgrade to Business. Your personal vault is preserved.
Why does my card payment keep failing?
Open Billing & plans and retry the outstanding invoice with a card that allows online / recurring payments. We attempt a failed recurring payment up to three times; after 48 hours the account is moved to the free plan; none of your data is deleted and paying resumes your plan.
I'm an individual but I see a 'linked-client capacity' message.
That limit applies to institutions and their client slots. If you see it as an individual, refresh the app and contact support@ficme.app — nothing on your side needs upgrading.
My institution profile is read-only.
Once FicMe approves an institution profile it is locked so the approved record can't change silently. Email support@ficme.app with the change you need.
Does the trust have to name beneficiaries?
No. If the trust deed names none, tick 'I confirm that the trust deed does not name any beneficiaries' below the Add button and continue.
How do I close my account?
Dashboard → Profile → Close account. You have 30 days to export your documents; after that they are deleted, subject to any legal retention requirement.
40. Getting help
Can't find what you need?
- Email support@ficme.app for product help.
- Email privacy@ficme.app for privacy or POPIA requests.
- Email security@ficme.app to report a security concern.
- See the full legal centre for our terms, privacy, POPIA and DPA documents.